
Table of Contents
Our #1 Choice For Hosting Blogs
62% Off Exclusive Offer Applied at Checkout
Regularly
$6.95/mo
Starting From
$2.64/mo*
- Free 1 Year Domain Registration on Select Plans
- FREE SSL Certificate
- Drag-and-drop Website Builder
- E-commerce Ready
- 1-Click WordPress Installation

If you are looking to expand your site readership or help its popularity grow, learning how to create a Facebook page for a blog which is located on your site should be on top of your list, and there is no platform better than Facebook to get you started.
Facebook presents bloggers with an ideal platform to establish a blog fan page. The platform has the most active users globally, which means that the fans you attract for your blog page are likely to read what you post.
It also allows you to separate your personal profile from that of your blog. Something many bloggers feel the need to do so their blogging, professional personality and actual one stay separate.
No matter what your reasoning may be behind making a Facebook page for a blog, it is the right step. This guide breaks down the whole process so you don’t face any problem and can establish the page within 10 minutes.
You might also like:
Heres how to create a Facebook page for a blog

- Select the option to create a page
- Establish your business or brand
- Add a blog fan page picture
- Upload a cover photo
- Change your Facebook page URL
- Add a description of your blog
- Fill out the information under the “About” tab
- Invite people to like your blog page
- Promote your blog fan page
In order to create an account for your blog, you will first need to have a Facebook account. So, if you already don’t, make a Facebook account first. For those that already have a personal or business Facebook account follow the following steps to create your blog fan page.
1. Select the option to create a page
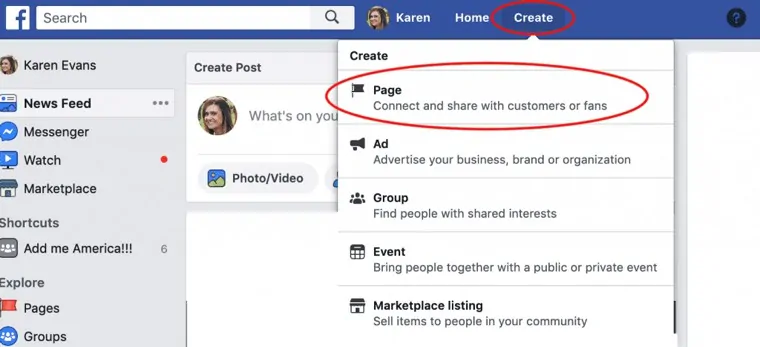
For those that are having trouble finding the tab or for any reason it doesn’t appear, you can go directly to the link to create a page which is here.
The following page should then appear:

2. Establish your business or brand
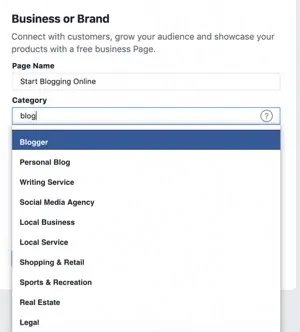
Enter the name and since this is for a blog, you can select either “Blogger” or “Personal Blog” under category, depending on which of the two categories your blog falls under.
After you’ve selected the category, you can hit the “Continue” tab at the bottom.
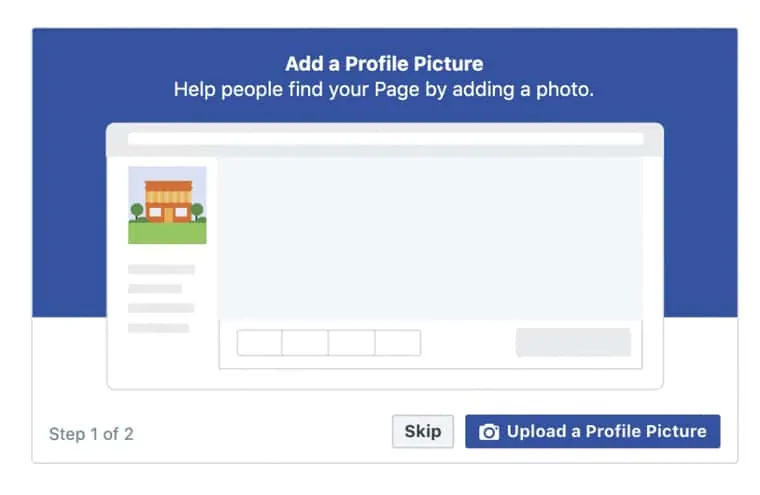
3. Add a blog fan page picture
You will now have the option to upload a profile picture for your blog fan page. Most personal bloggers upload a picture of themselves, others upload their logo. Whatever picture you upload here, make sure it is related to your blog.
For example, if you don’t have a logo but blog about food, then you can upload a picture of food items here. Just make sure the picture you upload is professional and gives fans a sense that you care about your blog. Since, this will be one of the first aspect of your blog fan page that users will view.
4. Upload a cover photo
Similar to your personal profile, your blog fan page also has a cover photo. You want to upload a photo here that relates to your blog, once again make sure that it is professional.
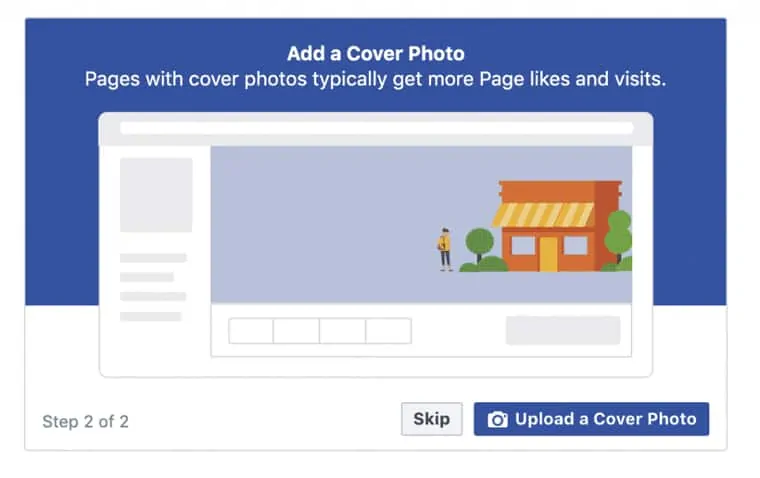
Once again, if you don’t have a photo to upload at this point and time, you can skip this step and do it later.
5. Change your Facebook page URL
After you’ve uploaded (or skipped uploading) your pictures, your blog fan page will be generated. One of the first things you want to do is change your page’s URL.
By changing the URL, you make it easier for users to remember it. In order to do this, you need to click on the “See More” tab on the left panel and click on “About”. The following page will appear:
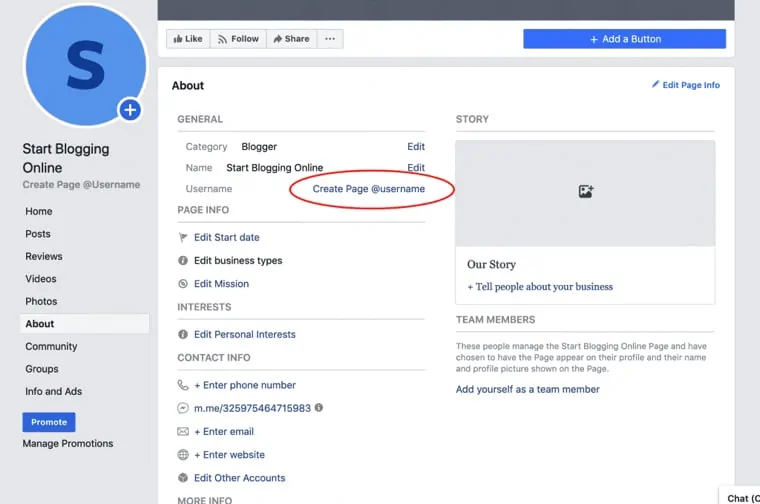
You then click on the “Create Page @username” option and another box will appear in which you can type in the username you want.
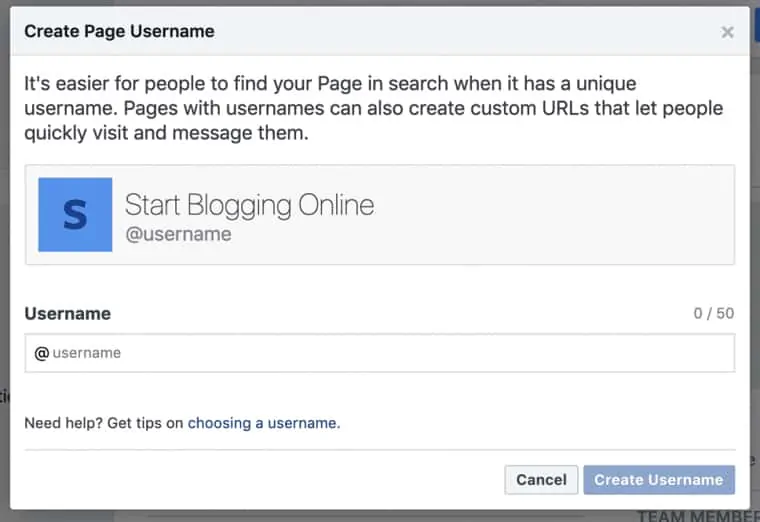
If it is available you can create the username and your page’s URL will also change according to the username. For example, if you select the username, personalblogger, then your Facebook fan page URL will become: www.facebook.com/personalblogger.
6. Add a description of your blog
After you have the URL sorted out, you want to add a short description about your blog. Here, you give a brief overview of your blog, what it is about and any other information you want to add.
This will be one of the first things viewers will read so you want to make it appealing. But make sure to keep it short also, summarize everything in under 255 characters since that is the limit.
To enter the description, you can go back to the homepage of your blog page and click on the option to “Add a short description.”
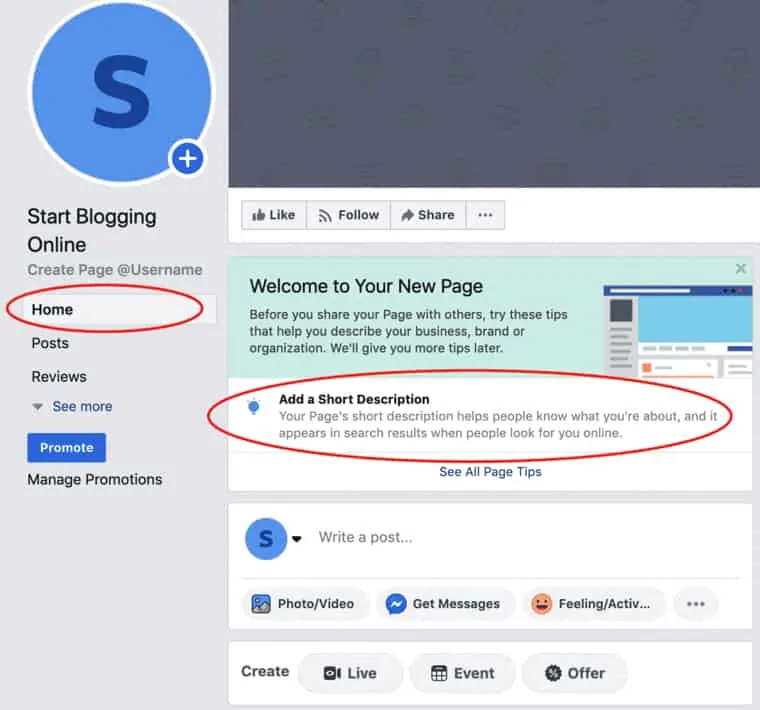
Click the “Save” tab once you’ve finalized your description.
7. Fill out the information under the “About” tab
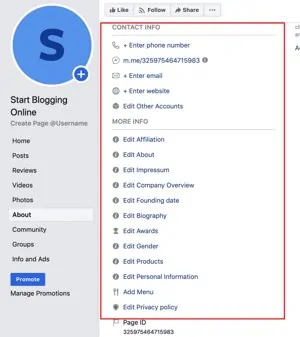
Now, you may not want to share your number or some other information. That is completely fine, you can fill as much as you want but be sure to have the basics filled such as website, company overview, founding date, and e-mail.
8. Invite people to like your blog page
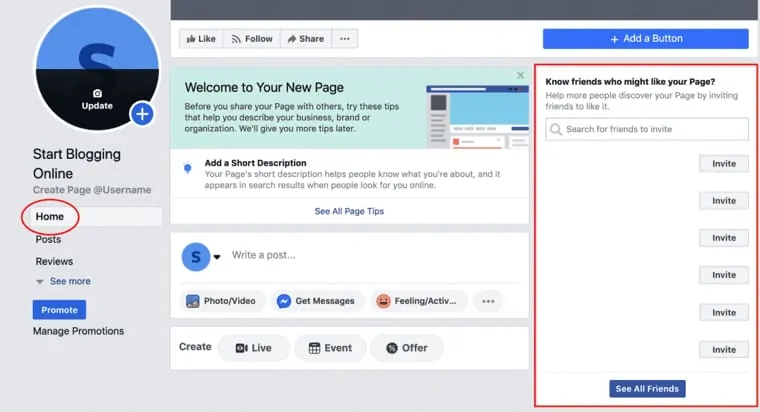
With your blog fan page now established and most of the information filled out, you are now ready to start inviting people to come and like/follow your page.
The best place to start is with friends and family that are already on your network. Facebook makes it easy for you to invite individuals from your network under the “Know Friends Who Might Like Your Page” tab. Here you can search and select all your friends in your network that you want to invite to like your page.
9. Promote your blog fan page
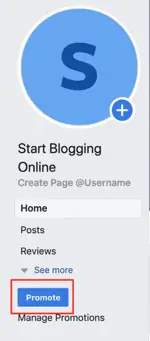
You can do this by clicking the “Promote” option in the sidebar. It is important that you have all your information up and have blog posts already posted on the fan page so once Facebook promotes your page, your visitors have something to actually interact with.
Then the following page will appear for you to select the goal of your promotion:
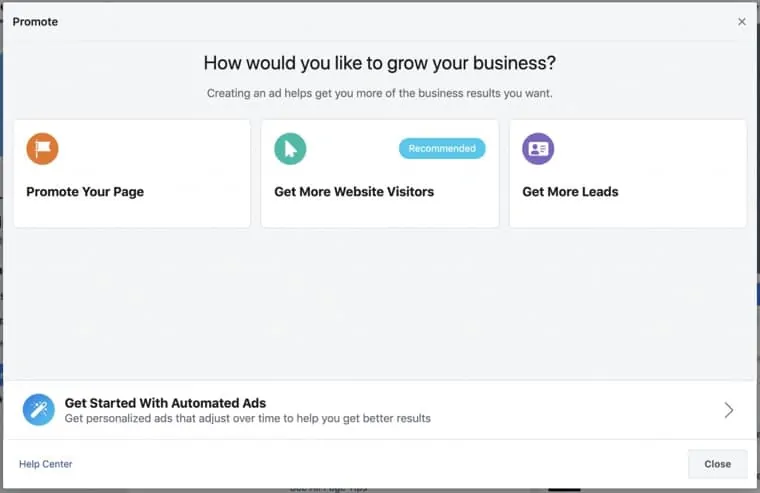
Initially your aim will be to promote your blog page, get more likes for it and reach a wider audience. So you want to select that and go through the process of promoting it.
With time as your page gains more popularity, you can start promoting your blog directly with the “Get More Website Visitors” option. But then again promoting your page is the equivalent to promoting your blog site since all your blogs will be shared on your page and fans will click through them to reach your website.
Facebook blog page conclusion
With that, your blog fan page is setup on Facebook and in no time, you will experience more traffic to your blog. The page setup process is fairly easy, what can be difficult is how you promote the page.
As long as you monitor your promoting efforts, you should have a strategy down in no time. All of which will help you gain more fans and readers for your blog.

Our #1 Choice For Hosting Blogs
62% Off Exclusive Offer Applied at Checkout
Regularly
$6.95/mo
Starting From
$2.64/mo*
- Free 1 Year Domain Registration on Select Plans
- FREE SSL Certificate
- Drag-and-drop Website Builder
- E-commerce Ready
- 1-Click WordPress Installation

Related articles:


