How to Start a WordPress Blog on Bluehost: 2020 Guide

Last Updated on

Call me old school, but I still believe old is gold.

In this case, I mean that compared to most other platforms, Bluehost has been around for quite a while and it’s still a good one which is why I’m going to show you how to start a WordPress blog on Bluehost with minimal fuss.

While a decent number of hosting companies have sprouted up in the recent past, millions of websites today are still hosted on Bluehost. The platform plays host to websites ranging from universities, e-commerce stores, and government sites, as well as personal blogs.

Most of these sites find it easier to host on Bluehost and seamlessly build their website using WordPress, due to the one-click installation of the web builder (WordPress) upon registering your domain. As a matter of fact, their partnership is so formidable that both platforms recommend each other for the respective services they offer.

We have already given you our review of BlueHost, but in this post, I will take you through the detailed process of how to start a blog with Bluehost using WordPress as the content management platform. In the end, you should be able to comfortably build your own blog from scratch, or you can do so as you move along this post.

If you’ve been looking for a detailed guide that provides more than just the technical steps to building a website, then you’ll want to pull your chair closer as we get started.

But first things first…

Our #1 Choice For Hosting Blogs

62% Off Exclusive Offer Applied at Checkout

  • Free 1 Year Domain Registration on Select Plans
  • FREE SSL Certificate
  • Drag-and-drop Website Builder
  • E-commerce Ready
  • 1-Click WordPress Installation

Why use BlueHost for blog hosting?

There are a couple of reasons why, but for now, I’ll give you five good ones:

  • Upon registration, you’ll receive a free domain name for a whole year, unlimited disk storage for your blog, very high bandwidth, and customized emails.
  • Companies and individuals who have used more than one hosting platform can confirm that Bluehost websites are relatively fast in processing requests. This is due to the decent speeds attributed to their dedicated servers.
  • Bluehost contains numerous databases including Python, PHP, MySQL, Ruby on Rails, PostgreSQL, and more.
  • The platform comes with free SSL Certificates for every hosted website to guarantee the security of user data.
  • Upon signing up on Bluehost, you can easily transfer your existing domain to their platform with zero fees. Depending on the plan you choose, you can also host other websites under the same domain.

    There are a ton of other reasons why someone would opt for Bluehost, and you can check out their website for more info.

How to start a WordPress blog on Bluehost

How to start a blog on BlueHost

Starting a WordPress website that is hosted on Bluehost is a fairly simple affair. Depending on the complexity of the blog, you may be able to finish it within a few hours, though some take weeks.

I’m sure some of you already dread the thought of working on your blog for weeks…

Well, we’ll try to make this guide as straightforward and as simple as possible so you can have it up and running in the shortest time possible.
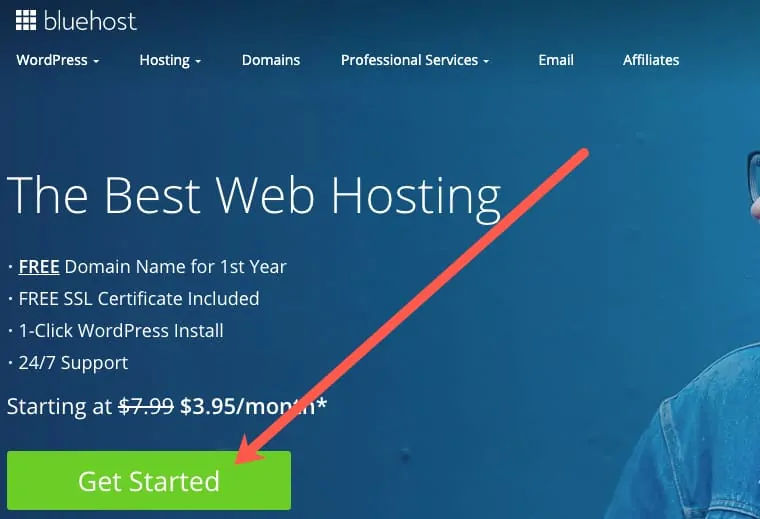
Let’s get started!

1. Head over to Bluehost and click "get started"

Head over to Bluehost and click on the Get Started button.
From the image, you can see that the starting fee is indicated as $3.95 per month.

2. Choose your WordPress hosting plan

Next, you’ll be required to choose your plan.

This is more of a personal decision, and you can choose any plan you prefer; there really isn’t a recommended or best Bluehost plan for a WordPress site.
Bluehost select plan

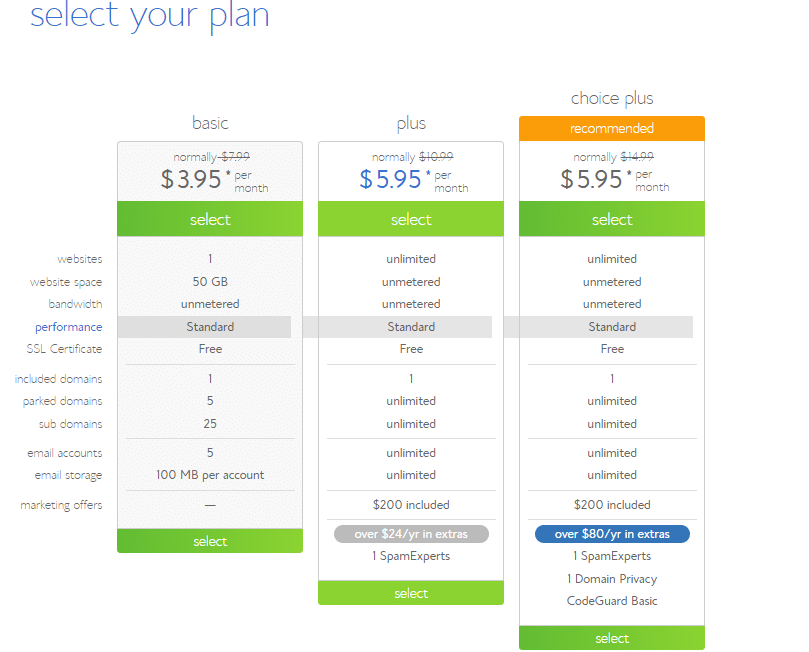
Bluehost offers three main plans: the Basic, Plus, and Choice Plus. The higher you go in the rank of the plans, the more advanced the features are.

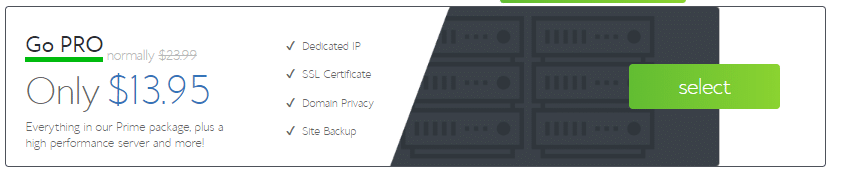
There is an additional plan called Go PRO.

The plan comes with everything offered in the Choice Plus plan as well as higher performance services, site backup, and more advanced features.

bluehost

Once you’ve decided on the plan that suits you, click on it to proceed.

Note that in this guide on how to set up a WordPress blog on Bluehost, we’ll be using the Basic plan.

When you click on your preferred plan, you should be able to see a page similar to the one displayed below.

Bluehost

This is the point where you’ll be required to key in either a new domain name that you wish to register or an existing one that you’d like to transfer to Bluehost.

For now, let’s assume you’re registering a new domain name.

3. Register a domain name

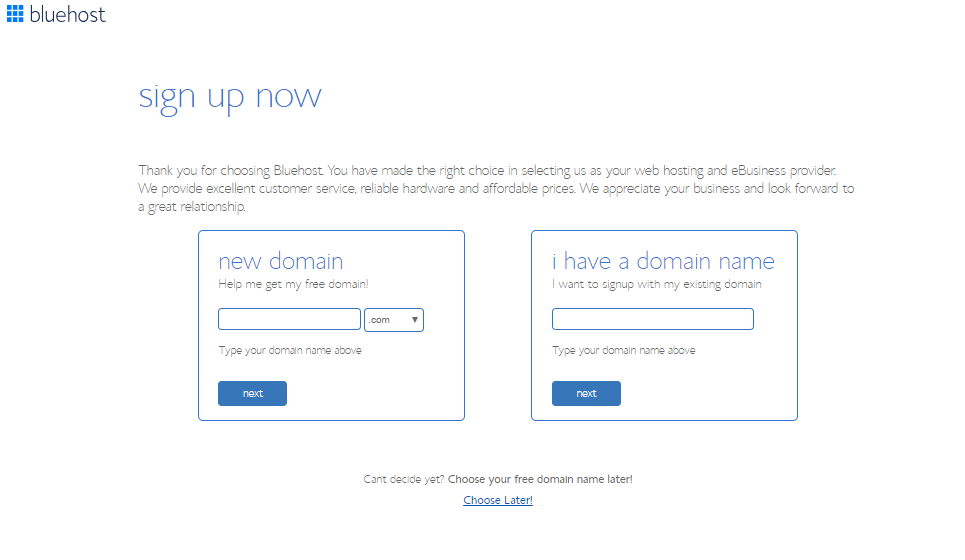
Type in your domain name without including the .com or .org.

There is a separate section for whichever suffix you’ll choose; of course, that will also depend on whether the combination is available.

image3 bluehost

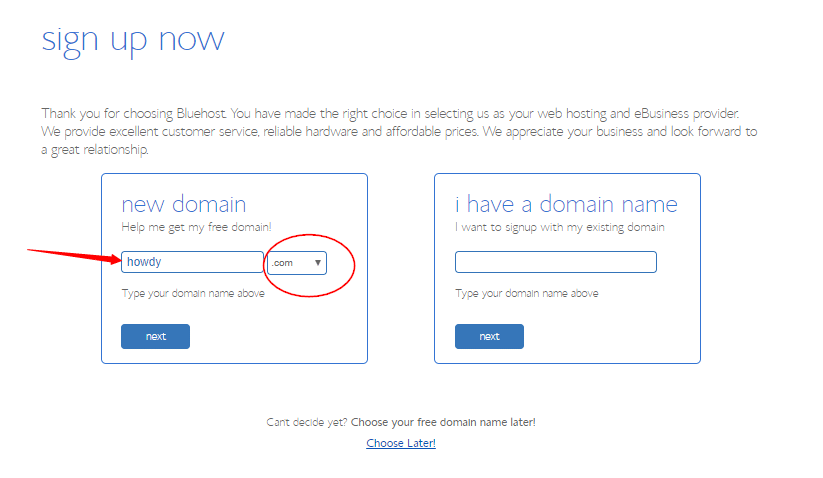
Once you’ve entered your domain name and selected your preferred suffix, proceed by clicking Next.

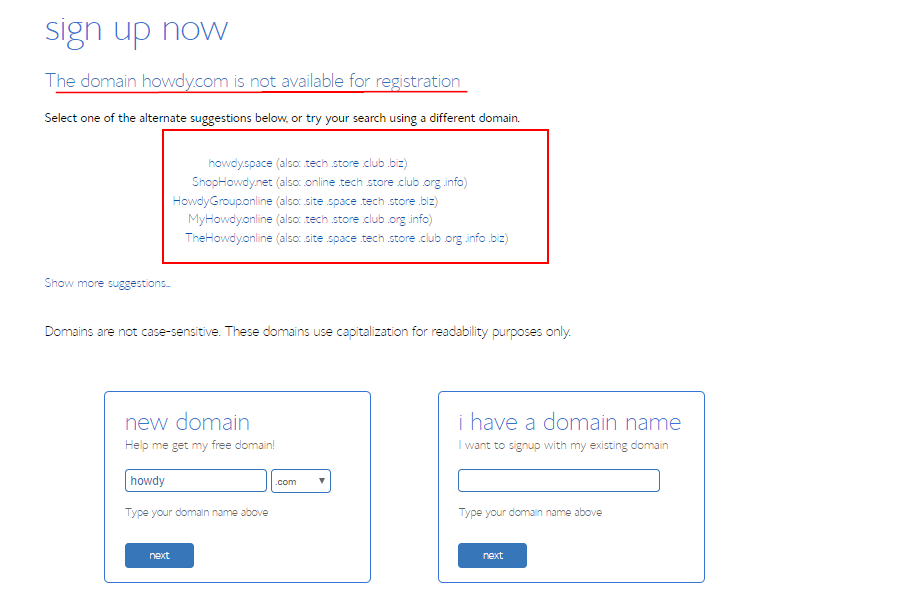
If you were to register the domain www.howdy.com, you’ll find that it’s already taken. There’s no cause for panic when that happens.

You will have two options; you can either tweak it by altering the characters without losing the intended meaning of the name, or you could opt for the same name with a different suffix such as .biz or .net as seen in the image below.

Bluehost sign up

In the example (www.howdy.com), when we alter the domain to something like www.howdyworldwide.com, we end up with a unique address that’s acceptable.

If you wish, you can also choose from the suggestions provided by Bluehost that contain the suffixes .com on them.

4. Enter your details into Bluehost

Once that’s done, you’ll be taken to the next page that requires you to fill in your personal details.

Bluehost sign up

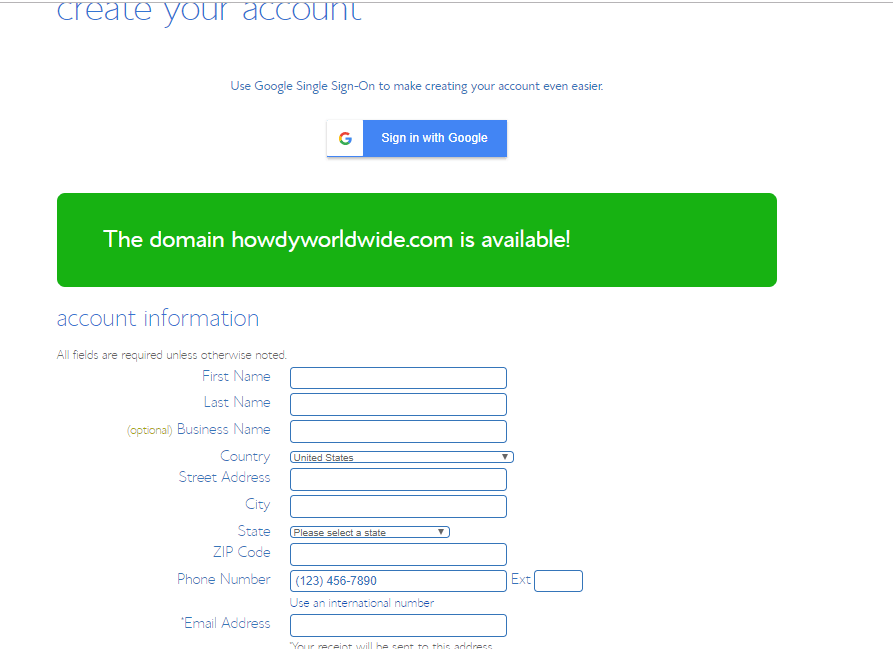
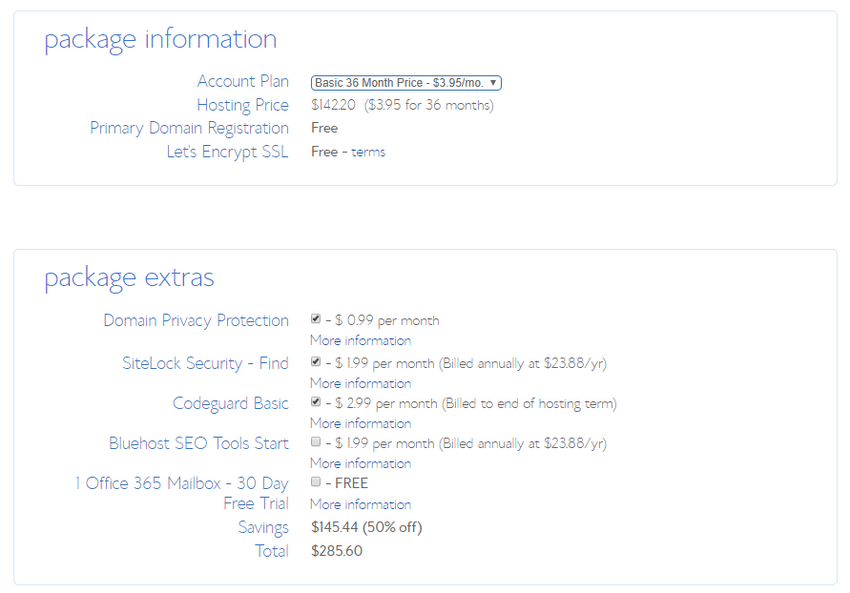
Fill in all the required areas including your name, email address, country of residence, and more. Right below this, you’ll see the payment methods plus the total amount to be paid.

For the best value, consider taking a three-year plan that offers the lowest hosting fee per month.

Bluehost package information

The three-year plan has a monthly fee of $3.95.

Or you can go for a 12-month plan, depending on your budget.

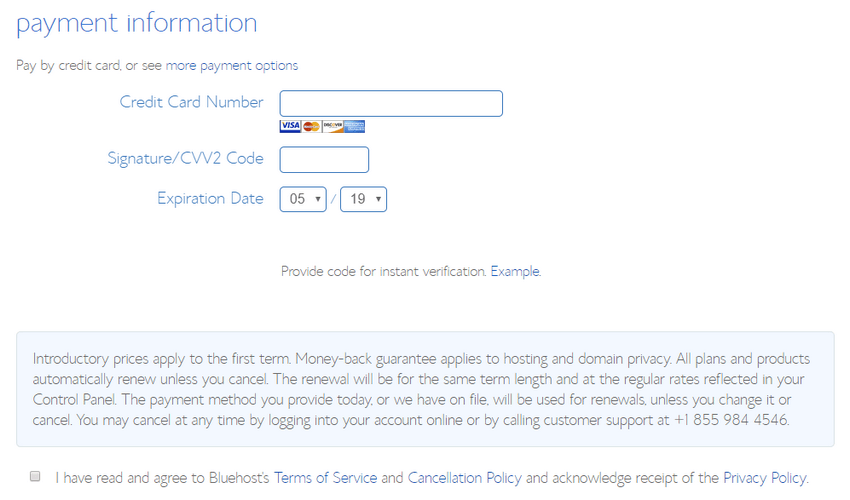
After filling in your personal details including your payment information, ensure that you check out the Privacy Policy of the platform as well as the Terms of Use and Cancellation Policy. If there’s anything worth being noted, it will be therein.

Bluehost payment information

Once that’s done, check the box to confirm that you’ve read all the relevant documents and wish to proceed.

5. Choose a secure password for Bluehost

You will be taken to a page where you’ll choose a password for your Bluehost account. Click the Create Your Password button, and key in the password of your choice. Check the small box to agree to their terms and conditions, and then click Next. You will be directed to a ‘congratulations’ page where you’ll be required to log in to your Bluehost account. Next, head over to your email address where you’ll find the login details and the link to your cPanel. The cPanel is the central control section for your hosted website.

Caution

A word of caution on this one – you want as much as possible to avoid using a password that is predictable, such as your name or your family members. Consider setting up a password that contains upper and lower case letters, special characters, as well as numbers. This way, however simple the words contained in the password might be, it would take a toll on anyone—even with special tech skills—to get past it.

6. Pick out a nice theme

Once you’ve logged in, you will be taken to a page where you’ll need to choose a theme (the way your site will look).

Don’t worry, there is a range of amazing themes to choose from.

After choosing a theme, you will be taken to a page that allows you to start building your blog. You will be asked whether you wish to build a business or a personal site; choose the appropriate one and proceed.

7. Start building your blog

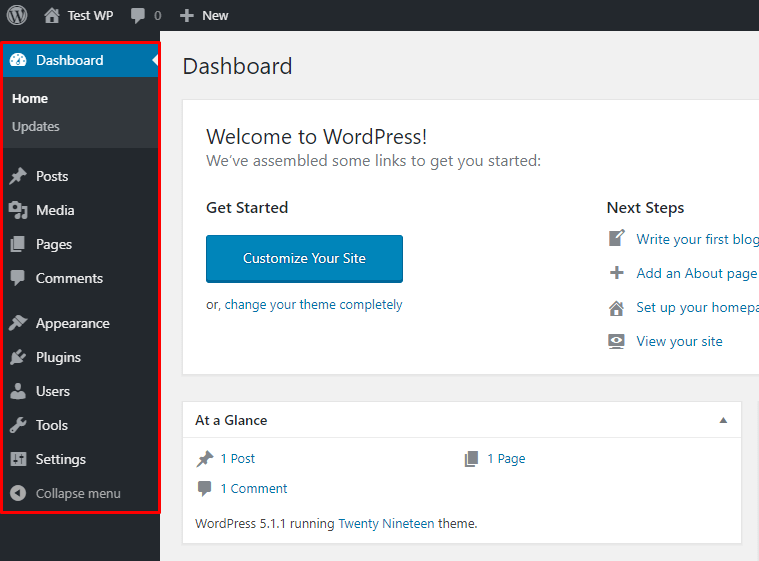
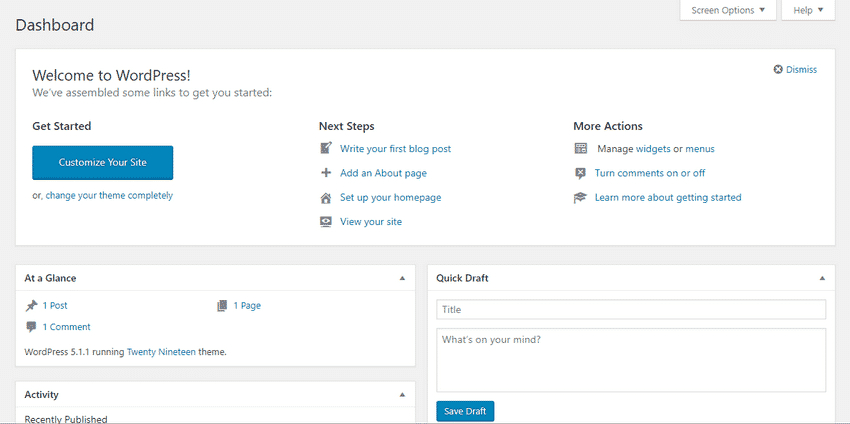
When you click on Start Building, you will be taken to the WordPress dashboard.

Wordpress Dashboard

If you prefer using a video guide, then this particular one by WordPress is quite helpful.

After watching the video, you should be able to cruise through this guide more easily as we will be elaborating on some of the areas already mentioned in the video.

Your computer should prompt you to install WordPress, but if not, go to your Bluehost cPanel and click on My Sites. You should be able to install it from there and log in.

Now, this is where the actual work starts.

If you had not chosen a theme at the starting point, consider choosing one before proceeding any further. You can find the themes under the Appearance menu in your WordPress account.

Whichever theme you choose, you’ll find that they are all easy to install and apply. Feel free to explore as many themes as possible; the best thing is that WordPress allows you to change your themes as regularly as you wish, with the option to fully customize all of them.

From your WordPress dashboard, you’ll have access to a number of menus including Posts, Appearance, Plugins, Users, Settings, and more, as seen in the image below.

Wordpress Dashboard Menu

Go on and customize your blog accordingly. You can arrange the menus, key in your services, and add your contact pages right from the Appearance section.

Depending on what you need your blog to look like, it can take you less than a day to have it up and running.

You can also hit the Visit My Site button at the top right-hand side of your dashboard. You will be able to view your blog the same way it will appear when you go live.

Once you have customized everything you need to, including the menus, posts, and contact information, you can hit the Publish button at the top right to go live.

Remember to note both your WordPress and Bluehost usernames and passwords. Also, consider bookmarking important pages such as the login pages; this will allow you to directly access any section of your blog easily at any given time.

Tip

As you go on building your blog, once you’ve made any changes, you might want to clear your browser history to be able to view the changes you’ve made on your blog. Otherwise, the site may not apply the changes as it would be launching the previous versions (without the changes). This is not standard with all browsers, but a good number of Chrome and Mozilla users have reported the slack in effecting changes unless the browser history is cleared.

All in all, take your time to understand your site. Understand that you will make a few errors here and there, but with this guide, the linked video above, and other useful resources on the WordPress site, you should be up and running in no time.

7 essential tips for your WordPress Bluehost blog

To help you get the most of your WordPress functionalities, I have a few tips for you:

  • The Appearance section is one of the most important sections of WordPress; take your time to understand how to place your menus and the other sections of your blog. Understand that this is the section that is responsible for how amazing your blog looks (or not).
  • If you’re going to spend 40 hours building your blog, consider dedicating at least 20 hours in this area to be sure that you got it right. Also, consider having friends lend a second and third eye to go through what you’re doing with your blog’s appearance. This way, you’ll be sure of publishing something everyone likes.
  • You can either choose to create new posts from the WordPress platform or from a different tool, such as Word, and upload it on your site. However, it is advisable to only upload content on WordPress once you’re ready to publish to avoid losing your data to system errors or internet instabilities. To upload a post, go to the Posts button, then click on Add New.
  • Only publish quality content. There are no ways around this. The best—and perhaps the only—way to surely grow your following, and thus your blog traffic, is by posting very high-quality content. This is the surest way of growing your readership, regardless of whether the niche is competitive or not.
  • You can easily add an image, video, or audio file from the Media section of your dashboard. However, the size of the media must not exceed 64 MB. Additionally, you can add any form of media to a post from the Posts section.
  • You can also add items to your sidebar or footnote through the Appearance section under Widgets.
  • Lastly, you can use tools such as Drip to send emails or newsletters to your readers. WordPress allows you to install such tools in one click from the plugins section.

Congratulations – Your WordPress blog is ready to go live!

There you go – you have learned how to start a WordPress blog with Bluehost from the start to the end.

The best thing about building your blog yourself is that you get to understand where to find anything you need at any given time. While giving the work to a developer might sound easier at the time, you’ll deny yourself all the fun of understanding your site works, and perhaps more importantly, you’ll pass on learning a key skill in this day and age.

If you have any questions or comments about anything contained in this guide, don’t hesitate to drop them in the comments section below.

For now, go on and make the internet a better place!

0Shares
Share or comment
0Shares

FREE: 3 month course on Blogging & Internet Marketing

was $1997.. get 50 video lessons 100% free

Learn how to...

  • Start a blog from scratch & scale to 6-figures
  • How to write content that Google LOVES
  • How to use Paid Traffic and Affiliate Marketing
  • SEO mastery so that your articles actually rank