Menus allow theme designers to let you, the user, create custom menus of your own. while the default menu will simply list current WordPress Pages.
WordPress supports multiple menus, allowing themes to support more than one navigational area, some examples of which would be the header and footer menu.
You can add pages, posts, and custom links to a menu using the drag-and-drop functionality. Also, for the more advanced user, you can add CSS classes to your menu items and change the appearance by adding custom styles.
Menus let you present your website structure to the visitors. These navigation menus help users find information and browse through several different areas of your WordPress site. Since these menus play such a crucial part in a website, they’re normally placed close to the header in most of the WordPress themes.
Types of menus in WordPress
The built-in navigation menu system makes it easy for beginners to create and manage menus in WordPress. The location of the menus, however, may vary from theme to theme.
Almost all WordPress theme these days come with at least one menu location. Some themes come with multiple menu locations in order to accommodate more complex WordPress sites.
There are different types of menus in WordPress like simple menus, drop-down menus, mega menus (great menus but are ideal for large sites with a billion bytes of content), and footer menu. You can also create a menu for your personal blog, in which case usually categories and subcategories are added as the navigation.
You can further include site navigation in the widget-ready area like the Sidebars in WordPress.
Now that the question “what are menus in WordPress?” is cleared up, I’m going to show you how easily you can edit, add, and use these navigation menus in WordPress.

Let’s get started!
Creating a custom navigation menu
To create menus in WordPress, you need first to visit Appearance > Menus from the admin area.
Once you’re in the Edit Menus screen (divided into 2-column), the left column will have your categories, pages, and custom links tab, while the right column is where you’ll add and adjust your menu items.
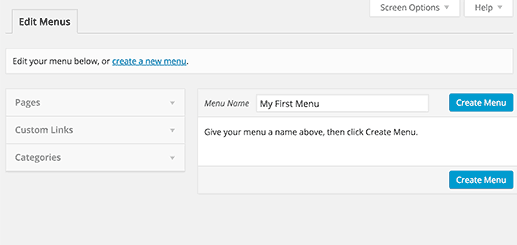
Now, let’s create your first custom menu!
Provide a suitable name for your navigation menu. In this example, I’m going to use the name “My First Menu.”
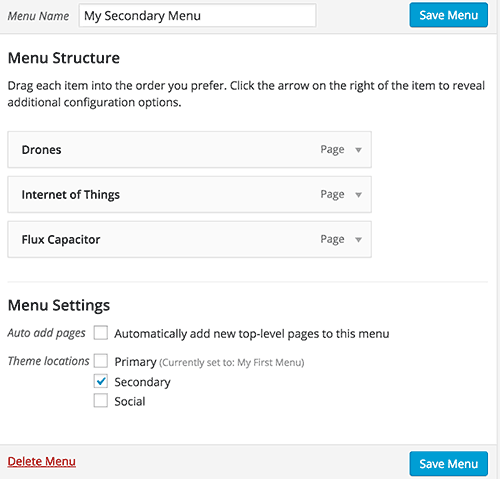
Next, click on the Create Menu button—this will expand your menu area, which will look something like this:
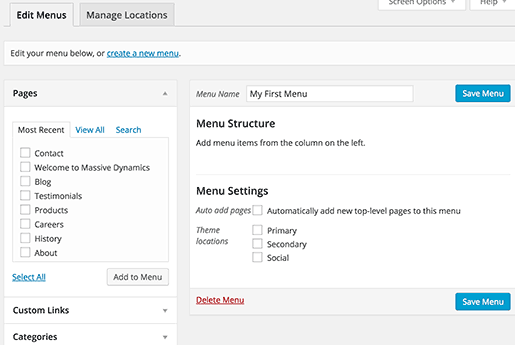
As you can see in the above screenshot, the “example” website has three theme locations called primary, secondary, and social. Keep in mind, location names and placements may vary from theme to theme.
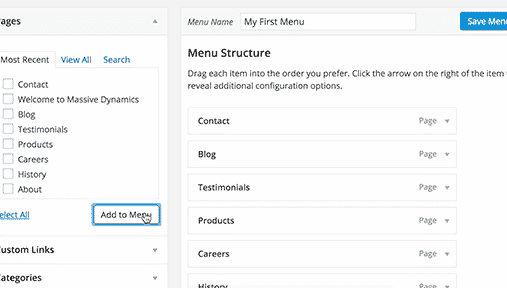
Now, select the pages you’d like to add to the menu. Do this by selecting the pages listed on your left-hand side and hitting the Add to Menu button.
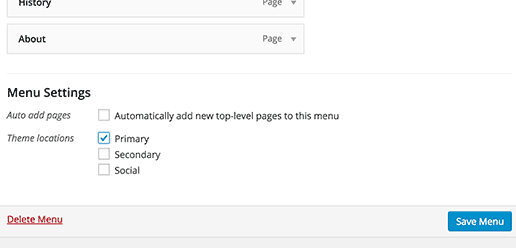
Once you’ve added pages to the menu, choose the theme location where you’d like to display the menu, then hit the Save Menu button.
Don’t panic if you’re not sure about where each of the menu locations is on your website. Simply visit the website to see your menu in action. If you don’t like the way it looks, you can always change its location.

Arranging items in your custom menu
Have you noticed something?
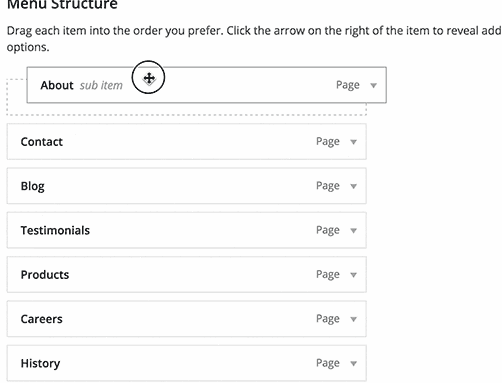
Each menu item that you added is now arranged in the exact order as you added them!
For instance, your About page link displays at the end, while the Contact page link shows up first.
Don’t worry. This can be easily rearranged in any order you please. Just drag and drop a menu item in order to adjust its position in the navigation menu.
Repeat the same process to create new menus for different theme locations.
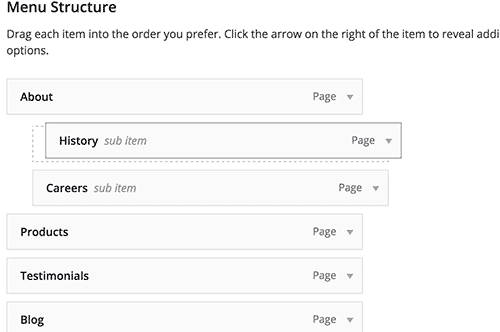
Creating nested dropdown menus
Drop-down menus are also known as nested menus. These are navigation menus with parent and child menu items. They’re usually styled by WordPress themes in a way that when you take your mouse to a parent item, all of its submenus will show up.
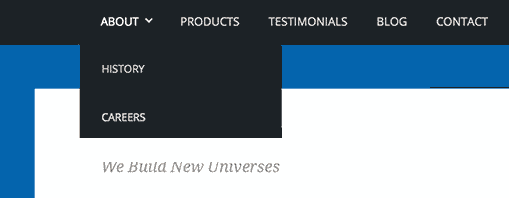
Creating drop-down menus allow you to incorporate a well-structured navigation system to your WordPress site. Here’s how to add a menu item as a submenu in WordPress.
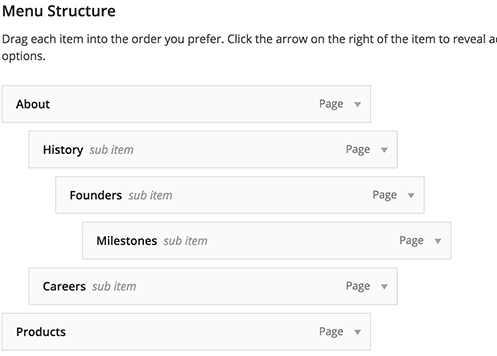
In your menu structure, drag the item below the parent item. Now, slightly drag the item to its right, and you’ll see that it automatically becomes a submenu item.
You can then add multiple layers of subitems to create deeply nested menus. But it’s important to note that all WordPress themes support multilayer nested navigation menus. Most do up to two layers.
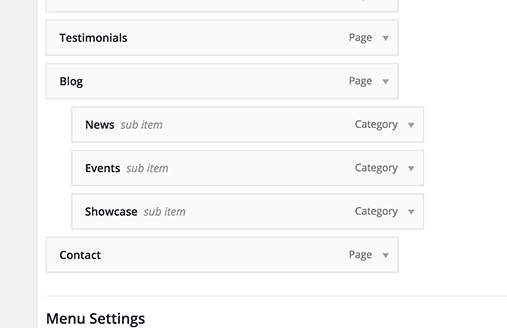
Adding categories to your menus
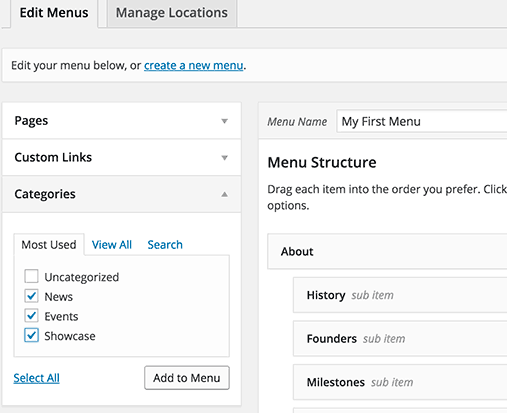
If you’re running a WordPress blog, you can easily add your blog categories as a drop-down in the menu.
By default, WordPress gives you an easy way to add pages and categories from the left-hand column on your menu editor screen.
Click on the Categories tab. When it expands, you’ll see your categories listed in there. Just select the blog categories you want to add to your menu, then click the Add to Menu button.
You’ll see that the categories are now displaying as menu items in the menu structure column. Similar to pages, you can drag and drop them to arrange the position on the menu. Here, I’ve dragged all the categories to display as submenu items under the Blog.
Adding custom links to your menus
Adding pages and categories is quite simple, but what if you wanted to add a link to your social media or another location? This is when the custom link option comes in handy.
Click on the Custom Link tab in your left-hand column. Once it expands, you’ll notice it only contains two fields.
The first one is the URL. Here, you’ll insert the actual link that you want to add. And the second field is called Link Text, where you’ll add the anchor text for the link.
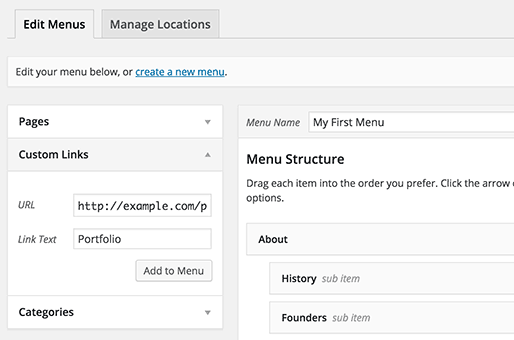
Note: It’s crucial that you start all links with http:// or https:// to make sure your links aren’t broken.
Editing a menu item
When you add categories or pages to your custom menu, WordPress automatically uses the category name or page title as the link text. This doesn’t necessarily mean that you won’t ever be able to change it.
You can edit all the menu items by pressing the down arrow next to the menu item you want to modify.
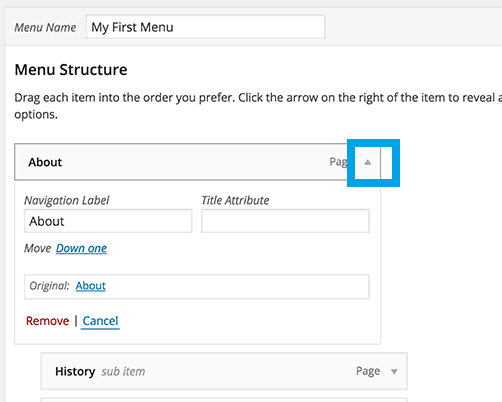
Here, you’ll be able to change the title or link text of the menu. Also, you can add a title attribute to the link. Just don’t forget to hit the Save Menu button to store the changes before previewing your site.
Removing a link from your menus
The process of removing a link is the same as you edit them. Click on the arrow icon next to any of the menu items.
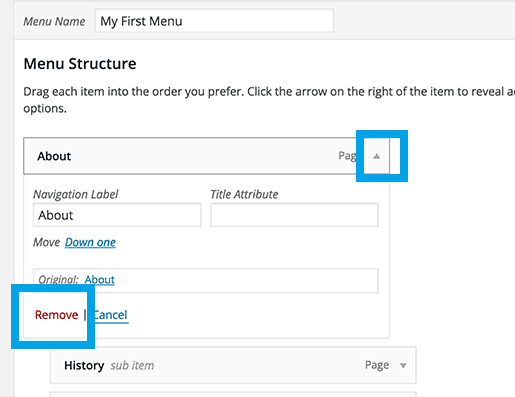
You’ll then see a red Remove link. Once you click on it, WordPress will remove the link from your menus.
Understanding theme locations for your menus
As I mentioned earlier, navigation menus are a WordPress theme feature. Their appearance and display are entirely controlled by your theme. The admin area only gives you a user interface to add and edit those menus.
Usually, a WordPress theme would have at least one theme location for menus. But some themes may feature more than just one theme location like the theme I used while writing this post, which had three theme locations.
Also, as mentioned earlier, the names of these menu locations will vary from theme to theme. While some will call it primary, another may call it a header. It’s totally based on the theme developer’s preference.
Adding menus in sidebars and other widget-ready areas
Besides the designated menu locations set by your theme, you can also add menus in your sidebar and other widget-ready areas.
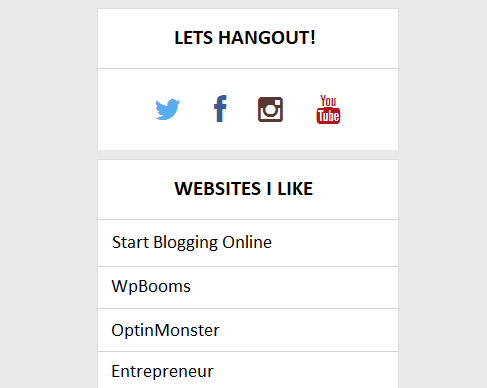
For instance, if you take a look at the screenshot below, you’ll see that the website is using menus to add sites and social links they like in the sidebar.
You can add navigation menus in your sidebars using widgets. Visit Appearance > Widgets and add Custom Menu from the list of available widgets to your sidebar.
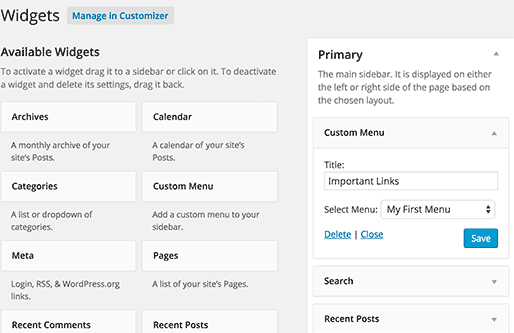
Next, set a title for the widget heading and choose one of your custom menus from the drop-down list.
Finally, click the Save button to store your changes.
If you visit your site now, you’ll see that your custom menu is displayed in your sidebar widget. As for social icons, some themes come with prebuilt social media icons in the menus. Additionally, you can use plugins to add icons in your navigation menus.
Wrapping up
So, there you go. I hope you’re no longer confused about what menus in WordPress are and how to create and add them in your website. Now, the next step is to learn about sidebars in WordPress and how you can take advantage of this other great WordPress feature.
Did you find this post helpful?
Let me know in the comments below if you have any questions or suggestions regarding where and how to use WordPress menus, I’d love to hear your thoughts on this interesting topic!