- Ensure general settings of the site is correct
- Create all essential pages
- Set the correct URL structure
- Make sure your website is ready to be crawled
- Create navigation
- Set the homepage to either blog or static
- Ask host for latest PHP
- Update WordPress to the latest version
- Add Email for the site
- Integrate social media
- Install a WordPress backup plugin
- Secure your website with a security plugin
- Check loading speed and install caching plugin
So here we go with the actual list. It consists of some of the most important steps that will help you to launch a WordPress website and make it ready to launch.
Let’s start our easy guide on how to launch a WordPress site to help you set the most important things up before actually launching your WordPress site…
1. Ensure General Settings of the Site is Correct
Go to Settings > General Setting and make sure all of the details are just as you’d like them to be, especially the tagline, the email address, and the URL of your website.
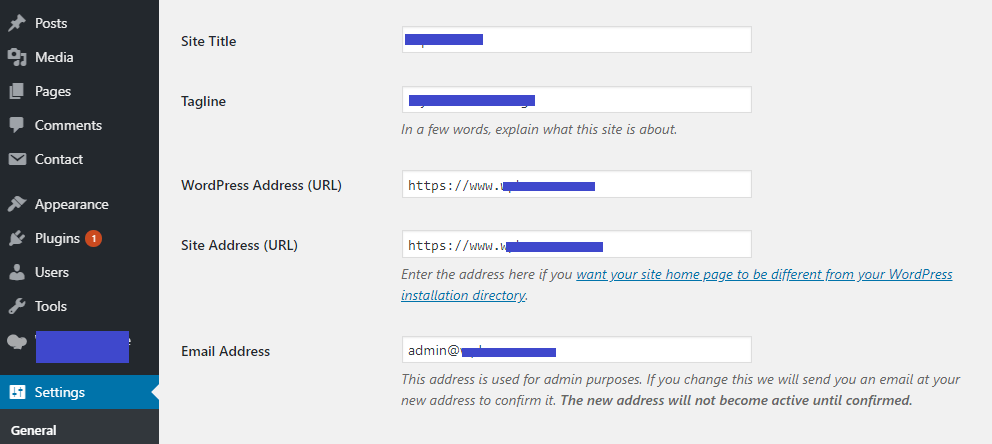
The Site title is where your website name would be. The tagline and name are important for SEO purposes, so make sure to use the right keywords for your new website.
The email address is used for admin purposes only. So, if you plan to change it in the future, an email will be sent to your new address for confirmation.
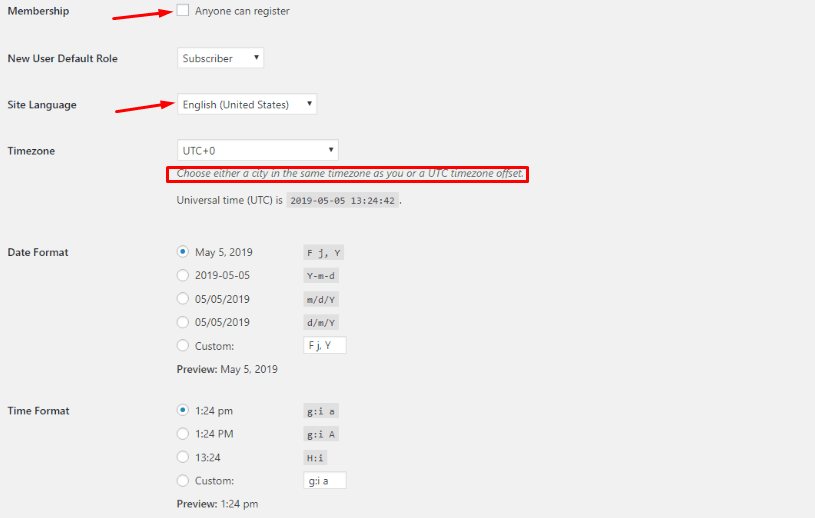
If you scroll down a little, you’ll see more additional settings, such as Membership (who can register to your website), Site Language, Timezone, Date Format, and Time Format.

2. Create All Essential Pages
Once you launch a WordPress website, there are a number of pages that should be on your site. Although these pages aren’t that exciting, their importance should not be underestimated. Some of these pages include:
- About Us: This will be a detailed overview of your business. You’ll provide sufficient details here so that someone who’s doing business with your website for the first time can easily understand who you are and what your business/brand is all about.
- Privacy Policy: This is a legal requirement in many countries. The “Privacy Policy” page explains to the visitor what type of information about them is collected by you and what you’ll do with such information to allay any privacy concerns.
- Terms and Conditions: This one is another legally required page. It helps to limit your liability, sets governing laws for your website, sets the copyright of the site, and references the privacy policy you apply.
- Contact: Your contact page has to be readily accessible and an actual contact form. It will provide information to help your site visitors get in touch with you. The page may contain several different forms of communication like phone numbers, physical location, social media, etc.
3. Set the Correct URL Structure
This is where you’ll be setting up your website URL structure. Head over to Settings > Permalinks.
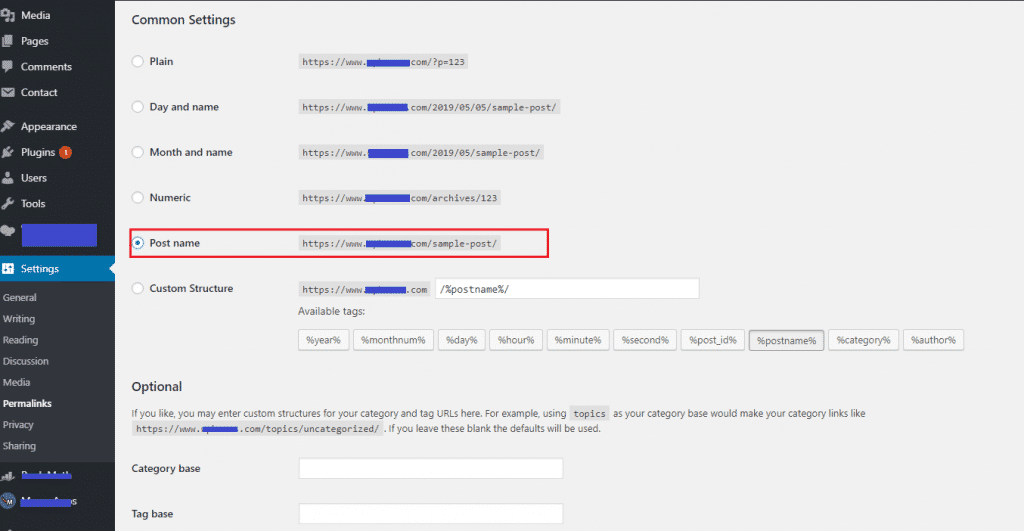
As you can see, it gives you five different options to choose from along with a custom structure field.
Choosing each of the five options will display your URL in different ways. We recommend using the “Post name” structure as it’s great for SEO. You can, of course, custom-make your URL structure based on the type of content you write, but this is not recommended for new bloggers.
If you scroll down a bit, you’ll find two additional permalinks options: Category base and Tag base. These are best left untouched for 99% of users.
4. Make Sure Your Website Is Ready to be Crawled
After you launch a WordPress website, you want search engines like Google to crawl your site. Go to Settings > Reading to ensure that you’re not discouraging Google from doing its thing.

You need to unmark the box next to Search Engine Visibility to make sure search engines can index you.
5. Create Navigation
Creating a menu for your website should be part of a long-term strategy for both your site’s SEO architecture and its user-interface. Once you get an idea about what your website structure will look like, only then should you begin designing and creating menu items as required.
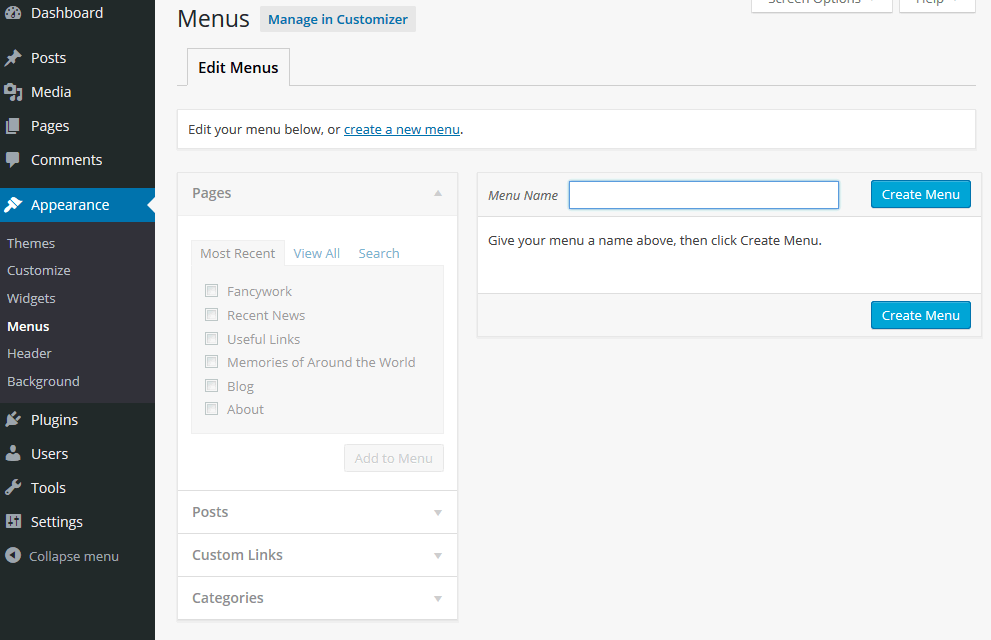
Go to Appearance > Menus. This will bring you to the Menu Editor where you can select create a new menu at the top of the page. Now, enter a name for your menu in the “Menu Name” box to create a menu.
After that, you can start adding items to it. You can also delete an item, customize them, and even create multi-level menus. Once finished, scroll down to the bottom of the page and click Save menu to make it appear on your website.
6. Set the Homepage to either blog or static
When you launch a WordPress website, you’ll notice that it either has a static front page (this is used to show your customized content) or a dynamic blog-like front page.
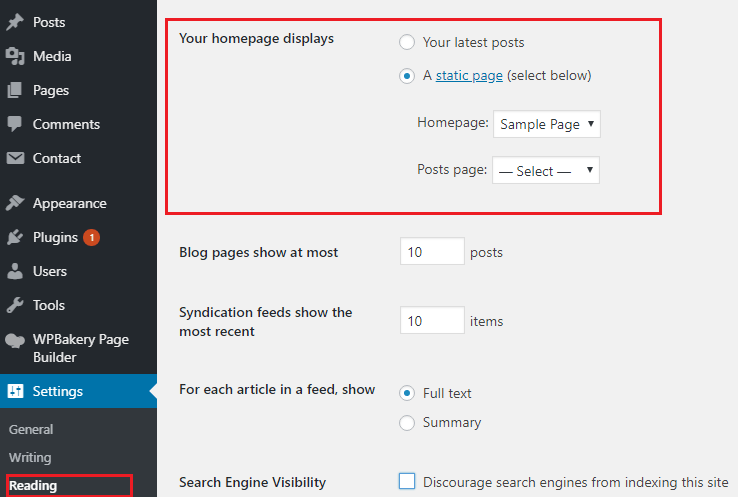
WordPress uses the first option by default. This allows your most recent posts to display on the front page. Some WordPress users prefer the second “static page” option, which is also known as a “custom homepage.”
This option is very useful for sites that want to keep a blog completely separate from other sections of the website. Also, this can particularly be helpful for those who want to display content other than their blog posts on the front page of their WordPress site.
It makes your site feel like a full feature website rather than just a blog. This feature is often utilized on business sites.
Before you plan to set a static front page, you need to create and publish the page you’d like to use as the static front page. Name the page whatever you want and choose your desired page template. You can configure this setting from visiting the Settings > Reading screen.
7. Ask Host for Latest PHP
Make sure your hosting meets the minimum requirements for WordPress.
Meeting the minimum hosting requirements isn’t really an issue with most hosting services out there. However, there’s a good chunk of websites that still use old, unsafe versions of PHP, Apache, MySQL and other software.
So, you need to ensure your hosting service is running on the latest version of both PHP and MySQL. I haven’t written the latest version here, but a simple google search will help you find out the most up to date versions of each. Try to avoid any host that pushes you toward old versions.
Here’s a letter you can send to your hosting provider; just copy and paste!
“Hi. I’m interested in running the open-source WordPress <https://wordpress.org/> web software, and I just want to make sure if my account supported the following:
PHP *latest version here* or greater
MySQL *latest version here* or greater OR MariaDB *latest version here* or greater
Nginx or Apache with mod_rewrite module
HTTPS support
Thanks!”
8. Update WordPress to the Latest Version
You should most definitely update WordPress. Why?
Well, updating WordPress comes with several advantages including:
- More functionality and features that you don’t want to miss.
- Compatibility with new plugins, themes, and web technologies.
- Speed and performance boost with each new WordPress version.
- Better overall security as updates fixes security vulnerabilities and bugs.
The easiest way to update WordPress is via your admin dashboard. It’s just a matter of a few clicks.
If there’s an update available for WordPress, it will display a notification at the top of the admin dashboard.
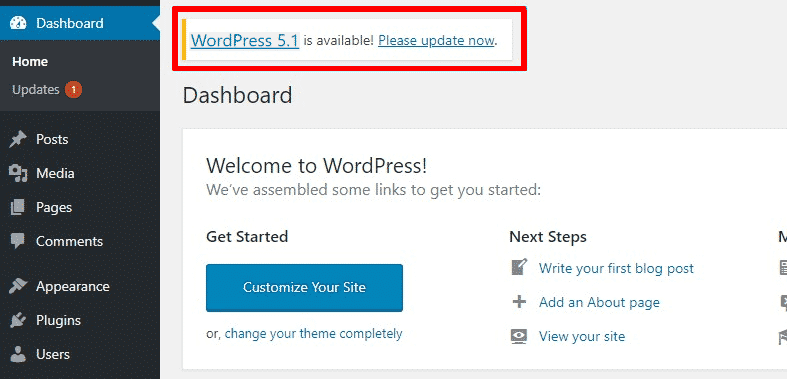
Once you hit the “Please update now” link, it will launch the update process.
WordPress will now take over and put your site in maintenance mode until all the updates are complete. This process involves deactivating and reactivating the plugins among other things.
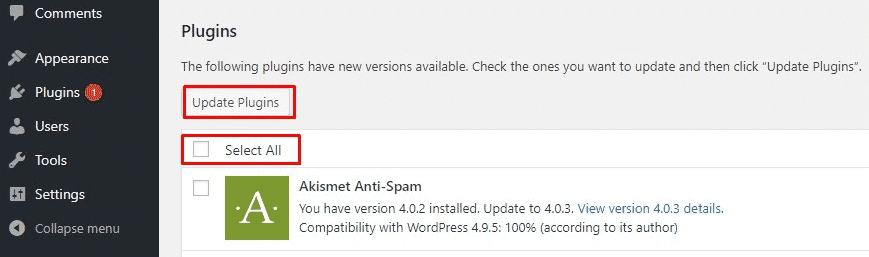
After a minor update, WordPress will redirect you to the Updates screen. Here, you can update your plugins and themes.
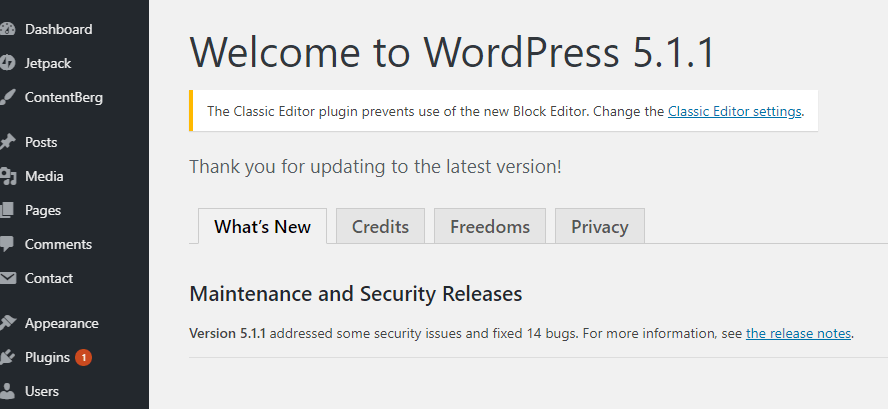
If it was a major update, for example, if you’re updating from WordPress version 4.8 to 5.1.1, a successful update will redirect you to the WordPress welcome page as shown below.
9. Add Email for the Site
Managing your email conversations via Gmail or Yahoo can detract from your beautiful WordPress site. Well, let’s help you fix your WordPress email settings to allow readers to contact you at an email address connected directly to your site’s domain.
All you need to do is add a WordPress SMTP plugin and configure it to send emails right from your website. Follow the steps below.
- Go to Plugins > Add New from your admin dashboard.
- Look for the WP Mail SMTP plugin.
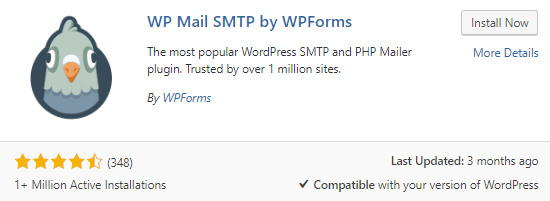
- Install and Activate the plugin
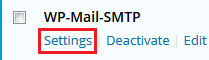
- Once activated, go to the “Plugins” page and click Settings under the plugin.
- Check all the boxes as shown below and choose the Other SMTP option.
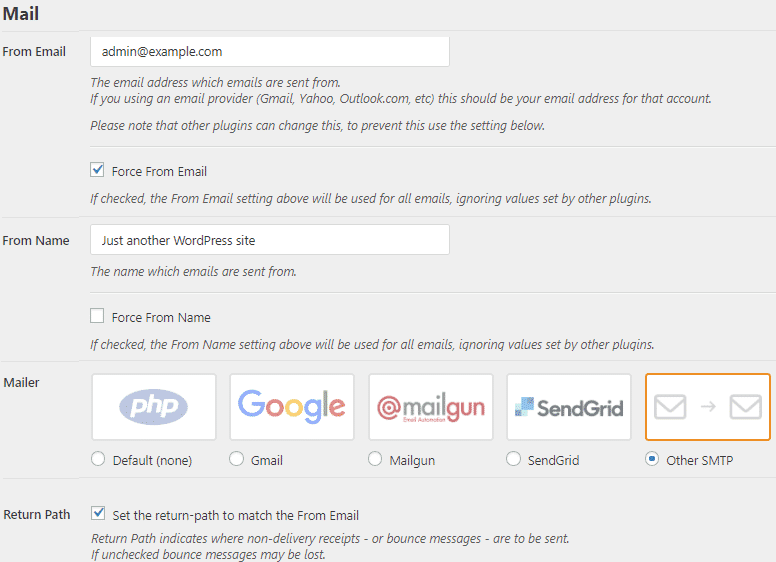
- Fill in the fields as the screenshot below.
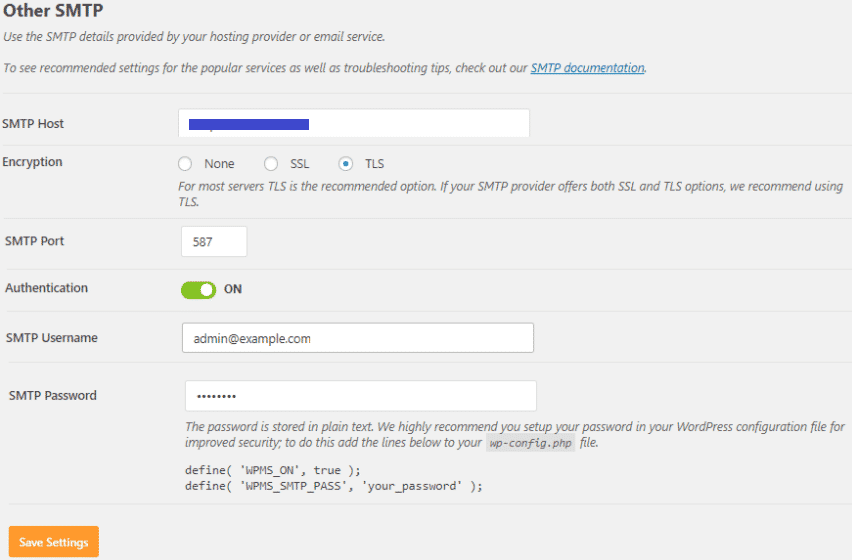
- Make sure to toggle Authentication.
- Click Save Settings.
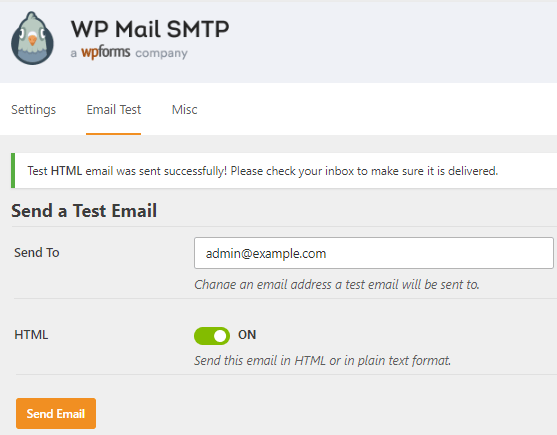
Finally, scroll on top of and select “Email Test” and click Send Email to test the plugin. You will see that the email has been sent successfully.
10. Integrate Social Media
A large segment of your site traffic will be coming from mobile devices. Facebook and other popular social media platforms drive a lot of mobile traffic. Therefore, you need to install a social sharing plugin for your website. For example, Social Snap can help to integrate your social sharing buttons easily.

Furthermore, you can boost your old posts through social media. You can even use their Social Auto Poster option to post your content directly on Facebook, Twitter, or Linkedin.
Furthermore, if you want to push posts to Twitter automatically, you can use plugins like WP to Twitter.
11. Install a WordPress Backup Plugin
No matter how carefully you launch a WordPress website, the odds of a breach or an accident will remain.
When this happens, the only thing that can save you is a backup plan. And what better way to back up your goodies than using a WordPress backup plugin!

Updraftplus integrates seamlessly with WordPress, allowing you to make backups and, most importantly, backing it all up to the cloud.
Remember, if you’re still keeping your backups on your own server, you might find yourself in some serious trouble if the files go missing.
12. Secure Your Website With a Security Plugin
Installing a good security plugin, such as Sucuri Security can be very helpful. In fact, it’s one of the first things you should do before launching your website.
The Sucuri Security plugin does an amazing job of ensuring your website is less vulnerable by performing a number of security hardening steps on your WordPress site. The remote malware auditing feature enables your website to save your website from possible unwanted access. Furthermore, you can use their premium plan to implement Website Firewall for giving the utmost security.
13. Check Loading Speed and Install Caching Plugin
Make sure your page load time is less than 3 seconds. The ideal page loading time of any website should be at least 3 seconds. Consider setting this as your benchmark and do whatever it takes to achieve that speed.
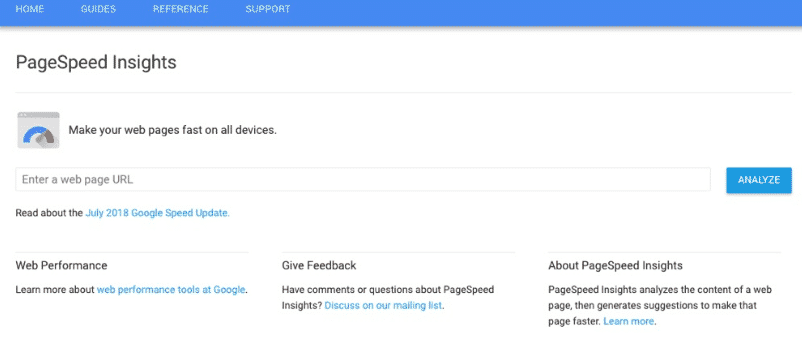
PageSpeed Insights is a brainchild of Google. This cool web app can measure and test WordPress performance on your website across multiple devices, including mobile and desktop browsers. This can be really useful if your site visitors are accessing your website from a variety of devices and screen sizes.
![]() Also, install a caching plugin like WPRocket for your WordPress site. It plays a vital role in making your site load fast. Hitting the database with multiple queries each time a user lands on your website will drag your site’s loading speed down. The plugin will ensure your website is served faster and your page loading speed is noticeably improved.
Also, install a caching plugin like WPRocket for your WordPress site. It plays a vital role in making your site load fast. Hitting the database with multiple queries each time a user lands on your website will drag your site’s loading speed down. The plugin will ensure your website is served faster and your page loading speed is noticeably improved.
Wrapping Up
If you made it this far, I guess it’s safe to say that you’ve completed all the items explained above regarding how to launch a WordPress site.
Developing and launching a site takes much more work than most of us would normally think. Thus, I made this tutorial to make sure you don’t miss out any of these important steps.
I’ve already covered all the basics in this article. But, if you still want to add your own steps and do more research along the way, then go ahead! Remember, the more research you do while you launch a WordPress website, the more robust and complete of a site you’ll have once it’s ready.
I hope you found this checklist helpful for your next WordPress project!