As a beginner who wants to learn how to install a WordPress theme you may find it confusing to do this at first, but don’t worry because in this article I am going to show you three different ways to do it.
There are thousands of free and paid WordPress themes available to choose from. If you want, you can choose free themes from the WordPress repository, but sometimes these free themes cannot fulfill your needs. In that case, you may need to upload a premium WordPress theme to your website.
To make your WordPress theme installation process run smoothly, we have divided the articles into the following three sections:
You might also like:
Table of Contents
How to Install a WordPress Theme: 3 Methods
- Install a WordPress theme from the official directory
- Install a WordPress theme from your computer using the upload method
- Install a WordPress theme using cPanel
Before you install a WordPress theme, you’ll need:
- Access to WordPress Administrator area
- A theme already downloaded to your computer
- cPanel access
How to Install a WordPress Theme from the Official Directory
By default, when you install WordPress on your hosting, you’ll get the Twenty Nineteen theme installed on your site. But, this is just an underlying theme where you may not find your expected designs. In that case, WordPress itself allows you to choose themes from their official theme directory. It is the easiest way to install a WordPress theme.
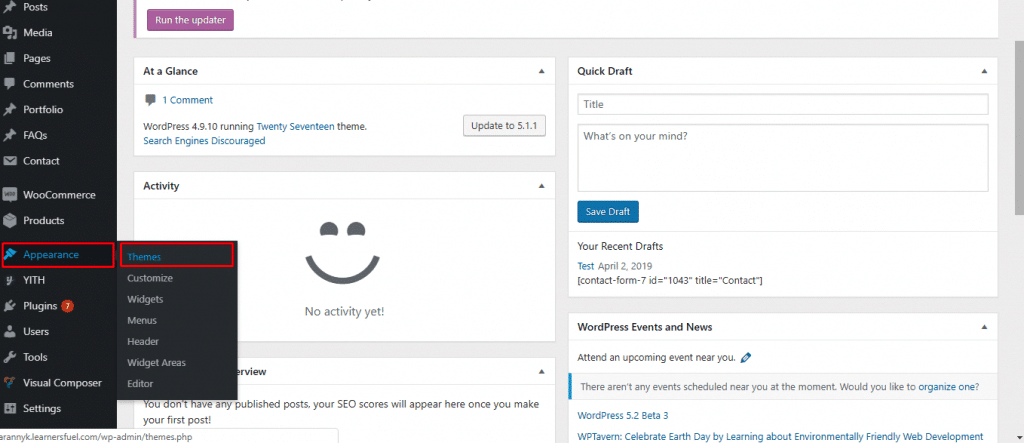
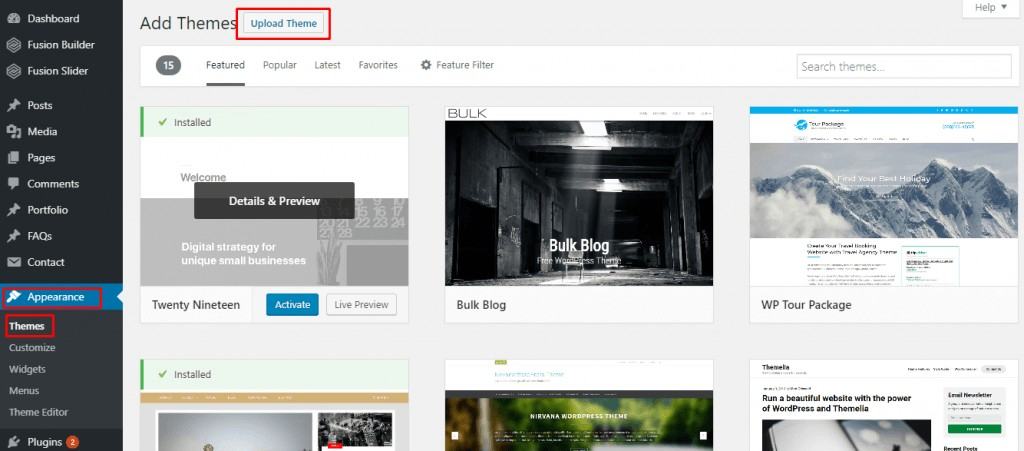
At first, you need to log in to your WordPress admin area and click on Appearance >> Themes just like the below screen.
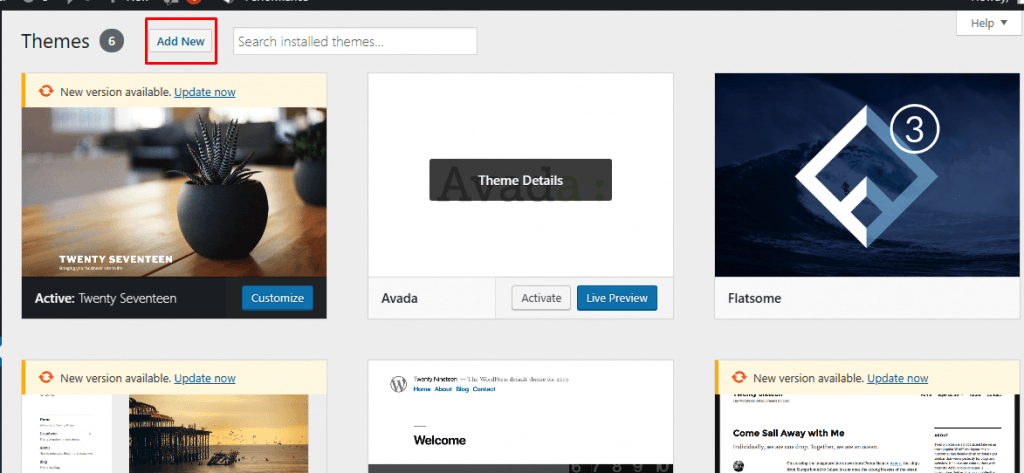
You’ll see a window like the below image. From that, click on Add New.
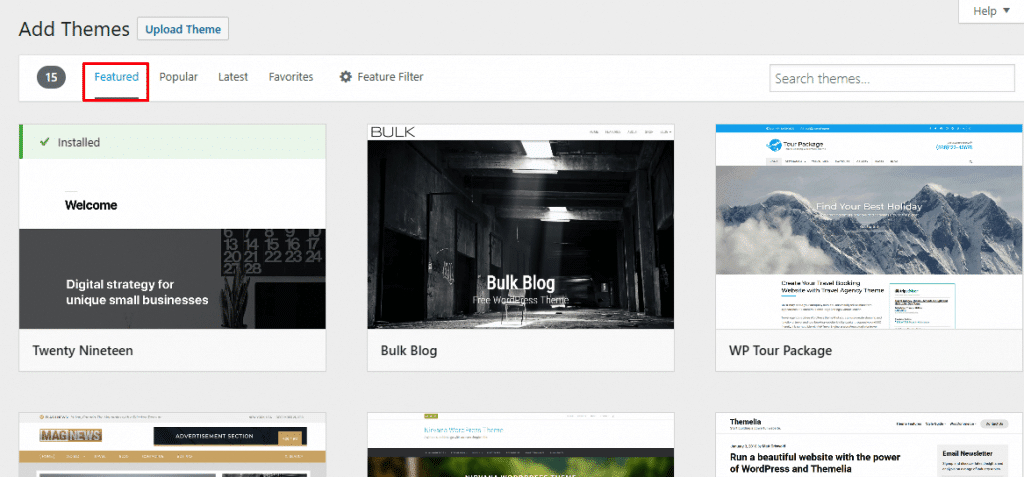
On the next screen, you will see all of the available themes from the official theme directory. You can see all of the featured themes here.
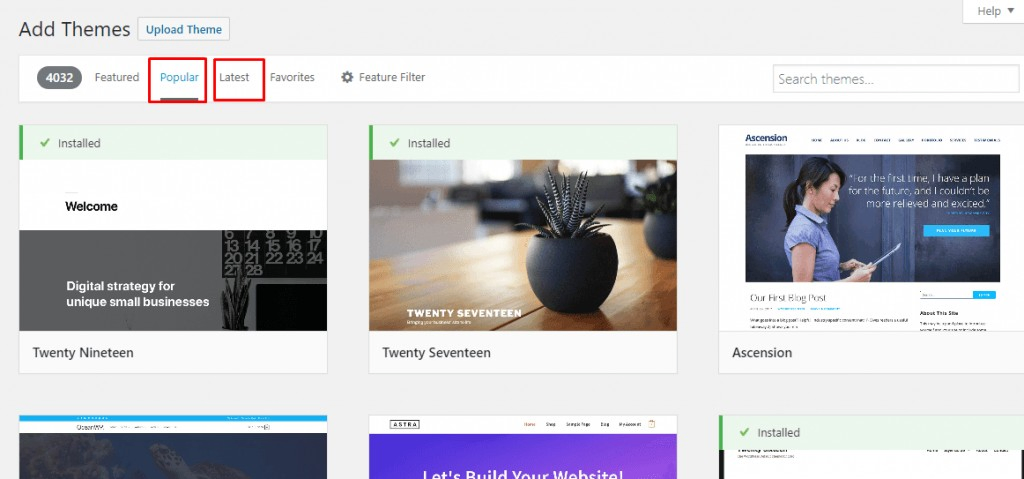
You can also check the popular themes and the latest themes by clicking on Popular and Latest.
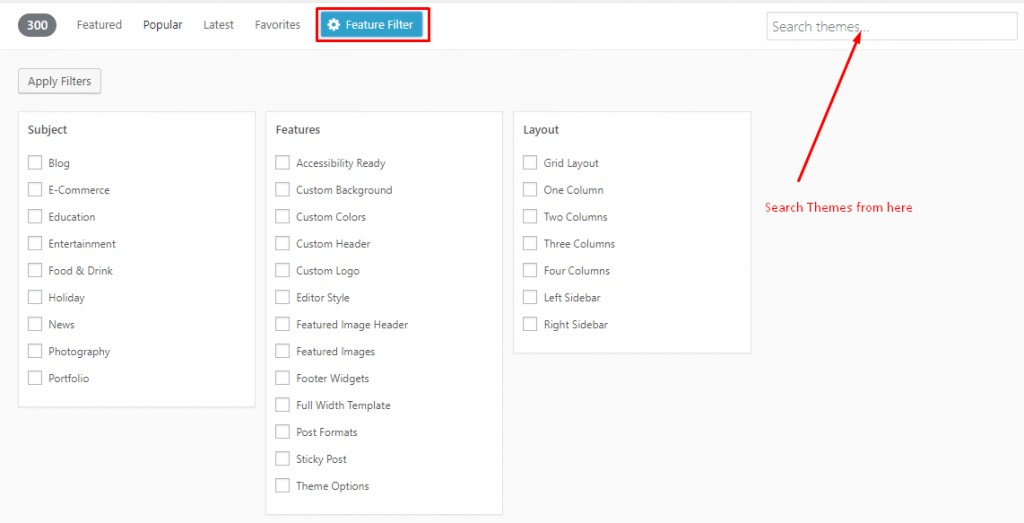
You can also use Feature Filter to find your desired WordPress theme. There are a lot of options by which you can find your WordPress theme. You can also search theme using the Search option.
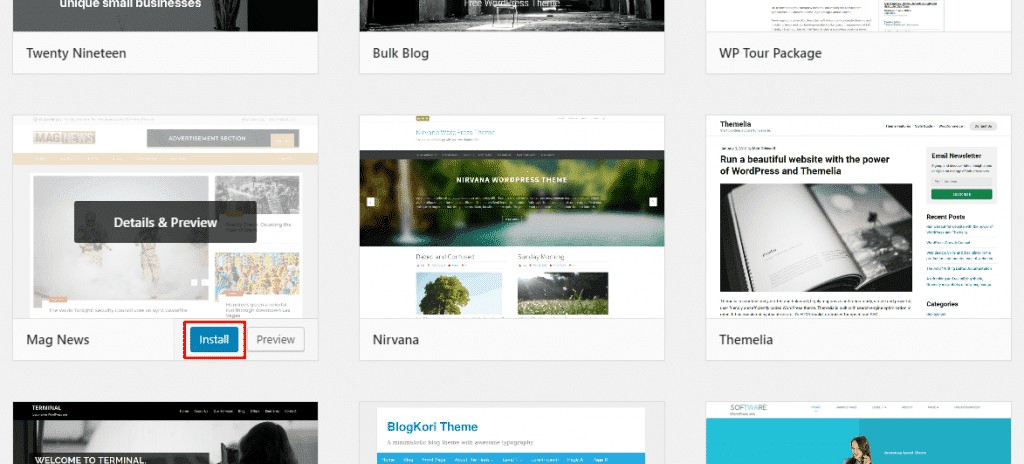
After finding your desired WordPress theme, click on Details & Preview or Preview to learn more about the theme.
When you decided on a theme you like, click on Install.
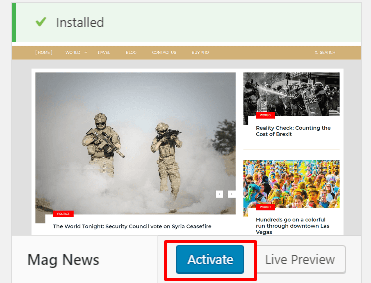
Congratulations! You’ve successfully installed a WordPress theme. Now, it’s time to activate your WordPress theme. Click on Activate and here you go. You can also click on Live Preview to see how the new theme looks on your website.
How to Install a Theme on WordPress Manually from a Zip File
So, we have already gone through the first method, but that method only allows you to install the free themes available in the WordPress.org theme directory.
The first method works fine unless you want to use a paid premium theme (check out our choice of the best WordPress themes by the way), a theme that doesn’t exist on the WordPress default theme’s directory, or you have any custom WordPress theme.
Before you start this installation method make sure that you have the downloaded copy (.zip file) of your theme.
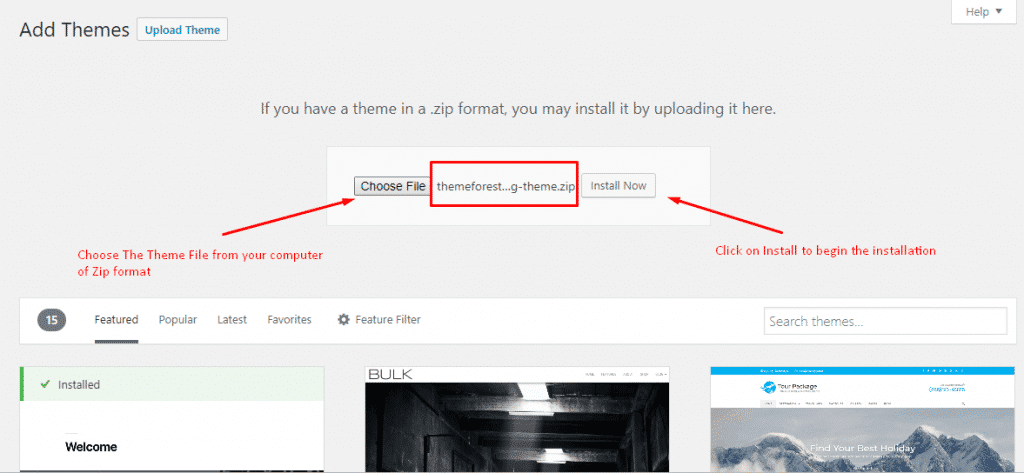
In this method, you need to use the Upload Theme options by clicking on Appearance >> Themes >> Add New >> Upload Theme.
On the next screen, you will see the option to upload your WordPress theme. After successfully uploaded your theme from your computer, click on Install.
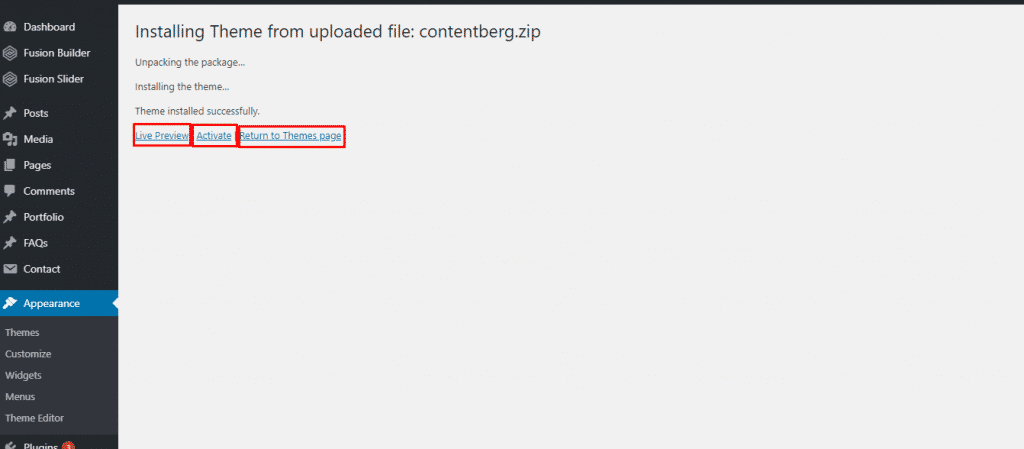
When you are done with the click on Install Now button, wait for a few moments when the installation is in progress. When the theme is installed, you will get the following three options:
- Live Preview– Here, you can see how the installed theme looks on your website.
- Activate – By clicking on this button, your theme will be activated.
- Return to Themes Page– If you click on this option you will return back to the previous theme install page.
Congratulations! Your new custom or commercial theme is now ready to use.
There’s one more way you can install a WordPress theme, let’s check it out.
How to Upload a Theme to WordPress in cPanel Manually
If you want to install a WordPress theme manually, then you can install the theme using cPanel in your hosting.
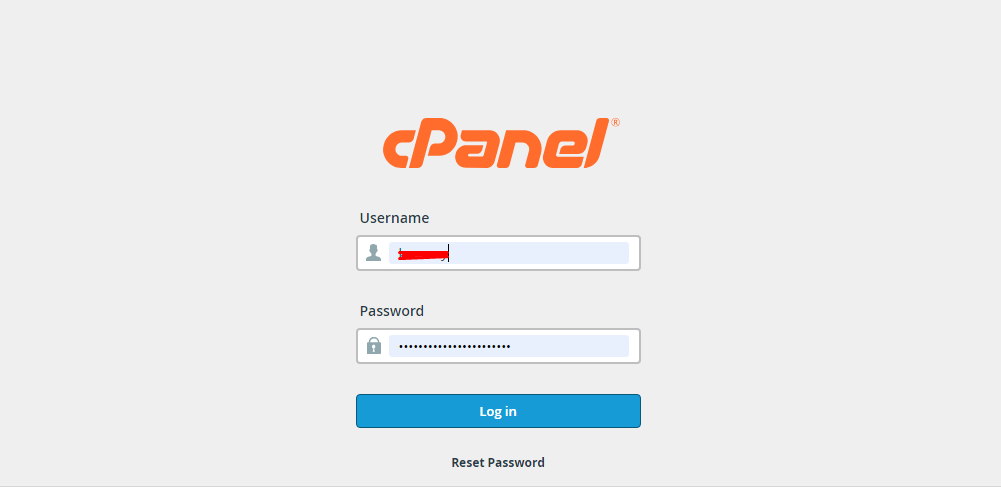
At first, you need to login to your cPanel account. To get access to your cPanel, you need to visit yourwebsite.com/cpanel. Then, you need to insert the username and password to get access. You can get these pieces of information from your hosting provider.
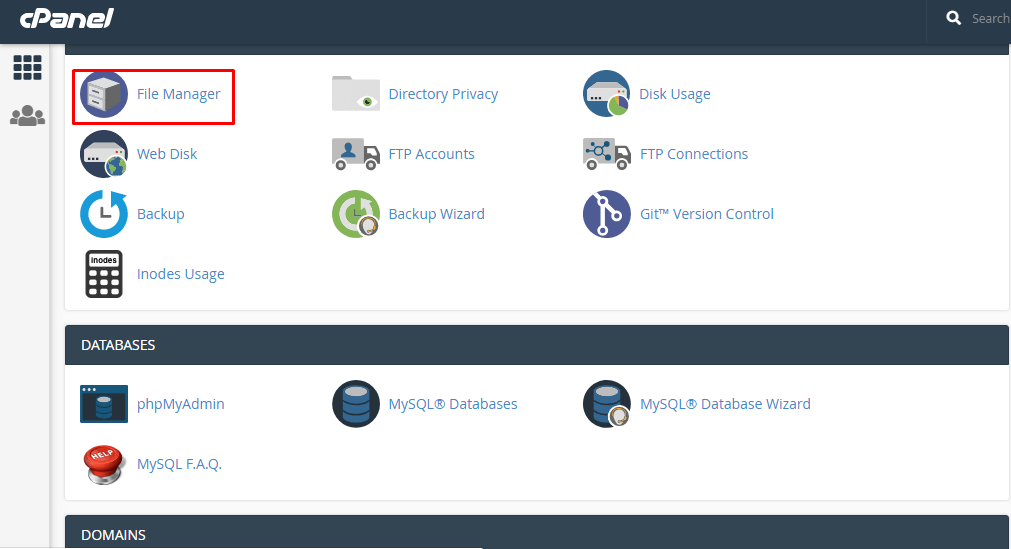
After successful login, go to Files and click on File Manager.
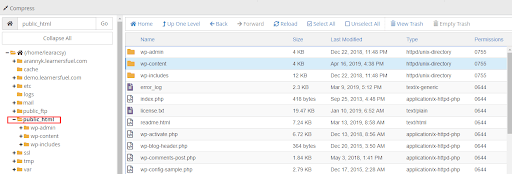
On the next screen, you will see all of your files. On the right side, click on public_html. You will see all of your WordPress files here.
Note that: All of the theme and plugin files are contained in the wp-content folder. As you are going to install a WordPress theme, you need to click on Themes.
After going to the next screen, click on Upload from the top navigation.
Now, it’s time to upload your WordPress theme in zip format.
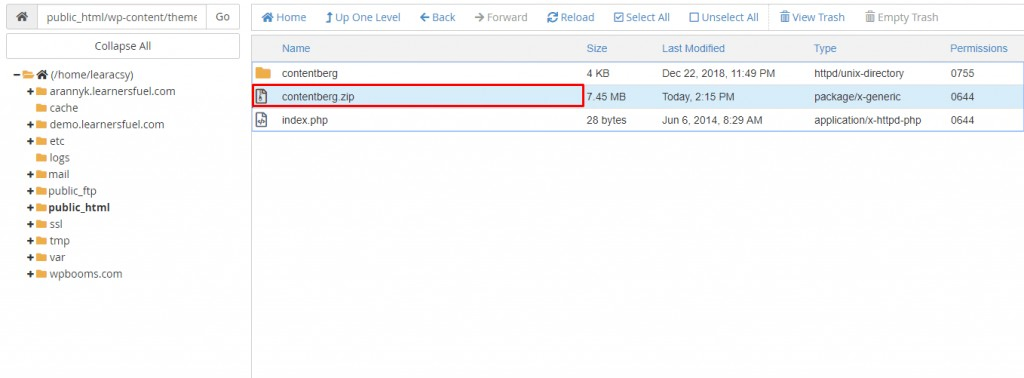
After a successful upload, return to the themes directory. You’ll see the recently uploaded theme in Zip format.
Your next task is to unzip the theme, and you’re done. Go back to your WordPress admin area, and you can see your recently uploaded theme from Appearance >> Themes >> Add New. Activate and enjoy the new interface of your website.
Final Words
I hope this helps to clear your confusion on how to install a WordPress theme, but if you have any problems please let me know! If you need more help with your blogging then you can also join my FREE blogging course at the button on the top of the page where I will answer your questions personally!

Our passion is Blogging, and we take pride in educating thousands of you fantastic people on this subject matter.
However, there is a global crisis happening TODAY, right under our noses. Climate Change is real, and we have the power to make an actionable difference.
We’ve partnered with GreenGeeks – the only Eco-Friendly Web Hosting company (powered 100% by wind energy) that runs a 300% Green Hosting platform.
By signing up through us, you can benefit from a FREE domain name and tons of freebies.
Get your Eco-Friendly site up and running now starting from as little as $2.95/mo

Related articles:


