Last Updated on
No matter if you have only just started to build your blog or you are a veteran – it’s always a good idea to learn about the new tools that could make the process easier, faster and more interesting. There’s a big set of such instruments in my toolbox, but this time I’d like to tell you about how to use Elementor Theme Builder.
If you are using WordPress for your blog you must have noticed that customizing it through the classic administrative dashboard is not very convenient, and while the new Gutenberg editor is great, there are still a lot of things that other page builders can do that Gutenberg just hasn’t got to yet (but more on that later).

 Now you have two options. The first is to create the page from scratch. It means you will drag different elements and drop them to the page workspace. The second is much easier, so I’ll show you this way…
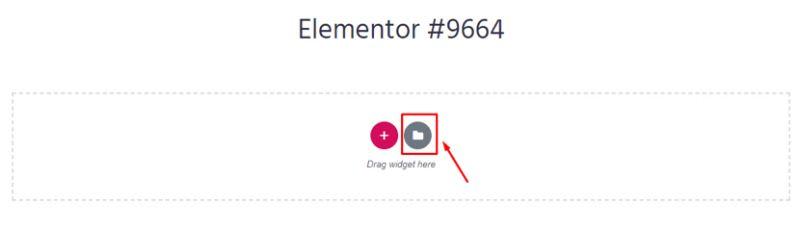
In the center of the work area you can see two buttons, click the grey “Add Template” button.
Now you have two options. The first is to create the page from scratch. It means you will drag different elements and drop them to the page workspace. The second is much easier, so I’ll show you this way…
In the center of the work area you can see two buttons, click the grey “Add Template” button.
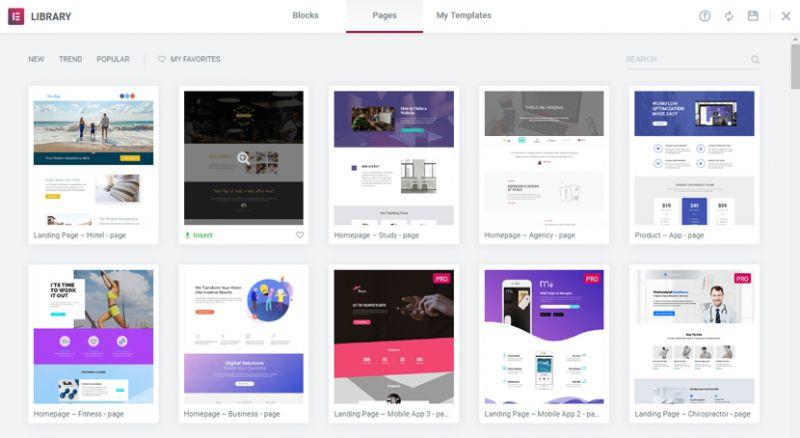
 The library which now opens contains lots of page templates and many of them are free to use. Elementor templates are not the same thing as themes. A theme is a set of ready-made pages, all customized in a solid design while a template is a collection of LEGO pieces (elements). Templates are basically one page comprised of many elements.
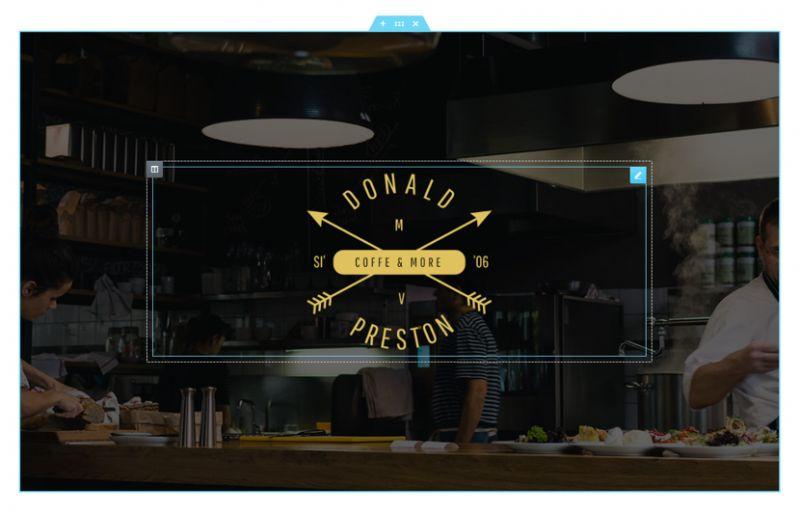
 Choose the page you liked and click the “Insert” button. I’ve chosen the Restaurant Homepage – just to show you what it looks like. The page you have loaded doesn’t affect the header and footer of your website – it fills only the “body” with demo content. As you can see – the inserted page is combined with customized standard elements and you can change them any way you want.
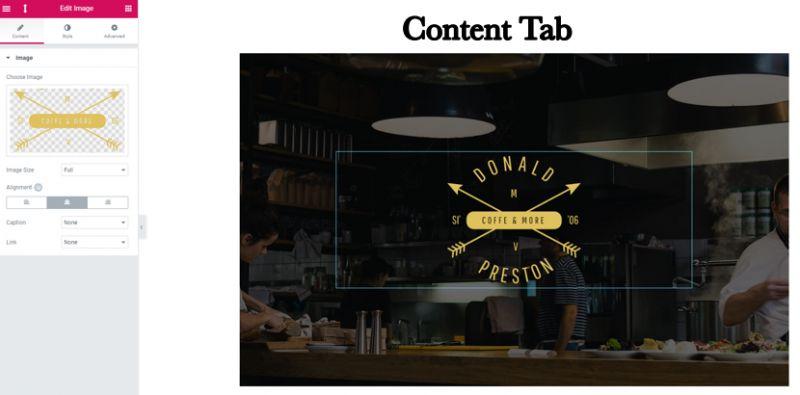
 To start the customization, you have to click on the element that you want to change and a menu will open in the field to the left. That menu has three tabs: “Content”, “Style” and “Advanced”.
The “Content” tab allows you to change what will be displayed in that element – text, picture, link or anything else. Here you customize the pure essence, without any styling.
To start the customization, you have to click on the element that you want to change and a menu will open in the field to the left. That menu has three tabs: “Content”, “Style” and “Advanced”.
The “Content” tab allows you to change what will be displayed in that element – text, picture, link or anything else. Here you customize the pure essence, without any styling.
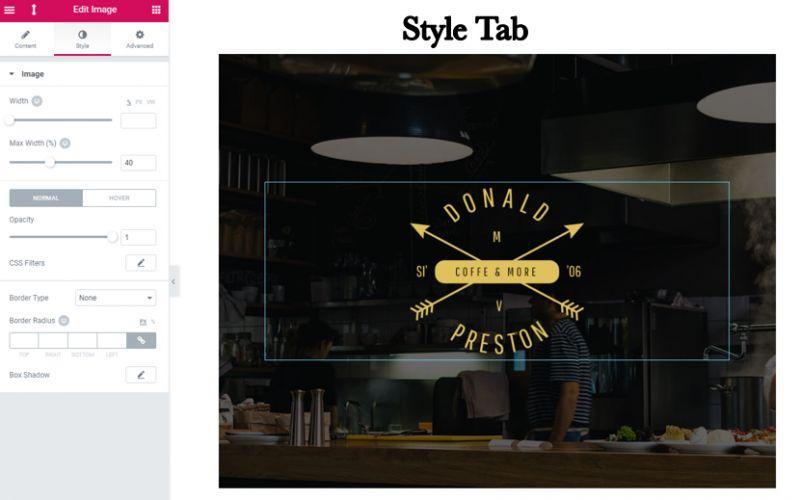
 The “Style” tab gives you the tools to change your contents appearance. Colors, fonts, backgrounds, alignments, borders, and margins. The interface is simple, so I’m sure you will understand how to use it after playing around just for a few minutes.
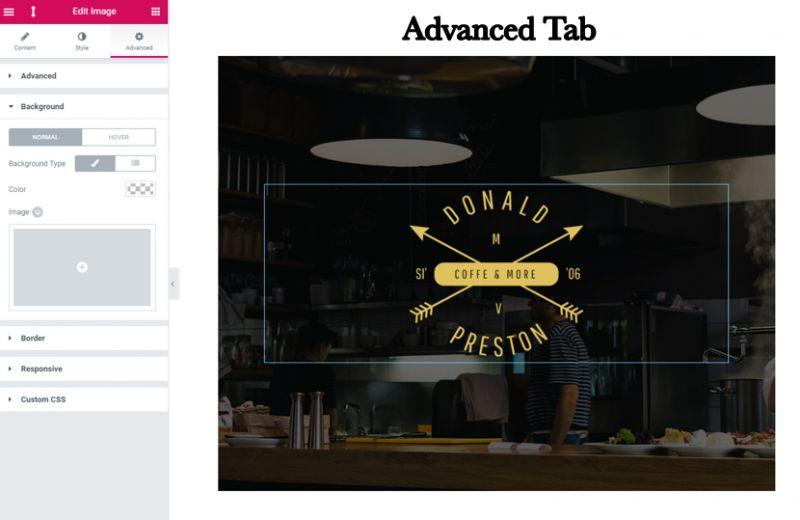
 The “Advanced” tab contains different additional functions like the whole element’s background or entrance animation. You won’t need it much of the time, but you still should still get to know the functions here for when you do need them.
 With Elementor Page Builder creating pages becomes easy and interesting like playing a video game. You choose the template with fitting structure, apply it, and then customize according to the design of the theme you use (or not, it’s totally up to you what your site should look like, but I recommend to at least stick to a set color scheme). Also, after creating a page you can save it as a template and use for all other parts of the website.
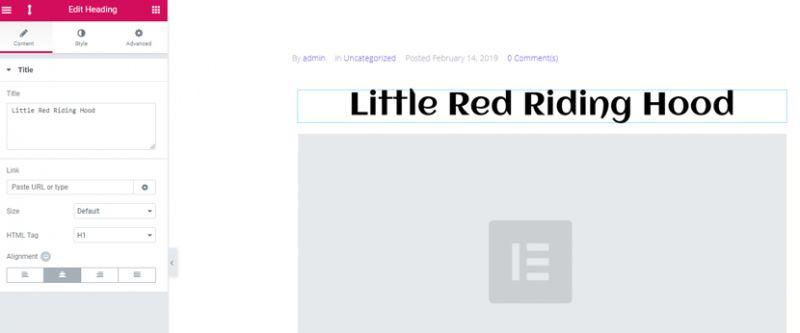
 It is time to make it all look prettier. Press the title element and set the details of the appearance you want it to have. In my case, I would like to change the font, alignment, and size of the title.
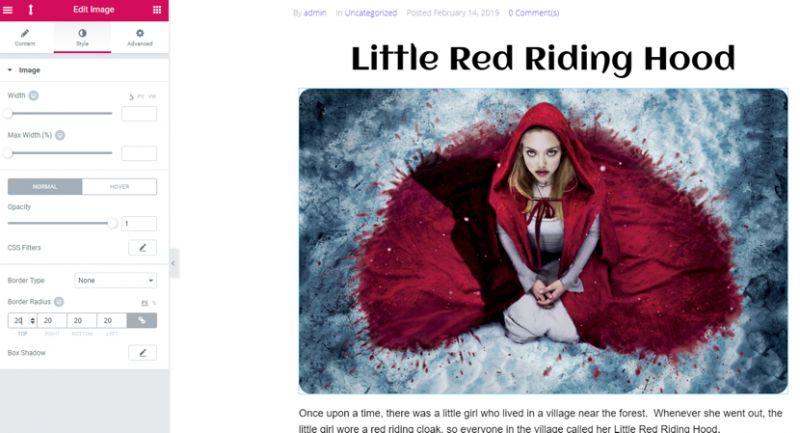
 Now let’s set the picture. Click on the image element, choose the picture and set the margins.
I also added the text of the post to the text section and changed the font and size of the letters. Sharing buttons and comment section are OK, so I left them as is.
Now let’s set the picture. Click on the image element, choose the picture and set the margins.
I also added the text of the post to the text section and changed the font and size of the letters. Sharing buttons and comment section are OK, so I left them as is.
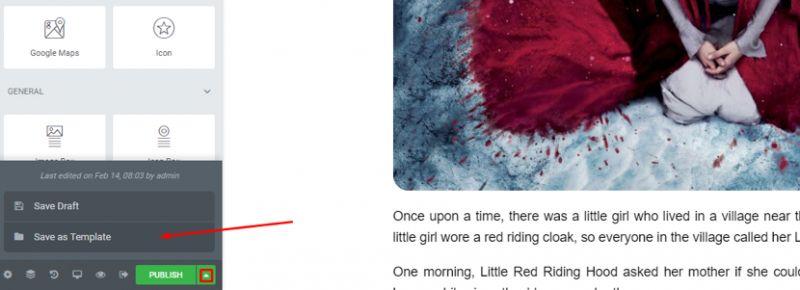
 Voila! A simple post page is ready. To save it as a template for further use you have to press the little arrow button in the bottom and choose a saving option.

Table of Contents
What is Elementor Page Builder?
Here I have to start with defining what a page builder is. Have you ever played with LEGO? I’m sure you at least heard of it – who hasn’t? 🙂 A page builder is like a box of LEGO pieces you can use to create any type of page. When you use the classic WordPress dashboard you can’t see the result as you are working, you need to click the “preview” button to see how the page looks. Page builders were created to overcome that – they give you an opportunity to see the changes just as you make them. All the manipulation of the article’s appearance is made with drag-and-drop elements. To put it simply, you construct the page or post from elements and then customize them to create a great looking page. There are lots of different page builders now: BeaverBuilder, Novi Builder, and as mentioned, even WordPress now has its own native builder called Gutenberg. You can say: “Hey if WordPress already has a page builder, why to install something else?”. That’s a fair question, and here’s my somewhat biased answer… I just love using Elementor, and that’s all! I used it before the WordPress team launched Gutenberg and I prefer to continue using Elementor page builder on most of my sites. There are dozens of useful add-ons for it on the Elementor marketplace and installing them really expands the available options. You, of course, can try some other builders, but as I, personally, am a fan of Elementor – I will use it as an example of page builders’ advantages.Why I love Elementor over other page builders
Yes, I got used to Elementor, but that is not the only reason I like it. It has a bunch of pros:- It’s free: There is an Elementor Pro paid version and it has its advantages, but the core plugin is completely free. You can download, install and use it without any other add-ons and it still has huge functionality. Especially important for the beginners that don’t have a big budget!
- Easy to use: The interface is simple, it’s easy to understand how to use the widgets, the interface is very user-friendly.
- Well documented: Beginners always make mistakes, it’ s normal and if you have some issues you can find the solution in the instructions.
- It’s a plugin, not a theme: Some page builders are in themselves a theme which you may think is a plus in some respects. if you ever want to change to a new theme, however, you can’t!
- It has loads of tutorials: There are dozens of video tutorials about how to use Elementor. Almost every widget has a “how to” article. For example, here’s a video describing the process of Elementor template installation:
How to use Elementor in WordPress
- Install the Elementor plugin
- Install a separate theme if you are using one
- Add new pages with Elementor
- Use Elementor to insert a template
- Create sections as needed
- Learn how to use Elementor widgets
- Edit background images to your liking
- Change the fonts as needed
- Repeat process for posts
How to Create a Page with Elementor
Open your WordPress administrative dashboard and go to Pages > Add new. Click the “Edit with Elementor” button and you will be redirected to the Elementor customization panel. Now you have two options. The first is to create the page from scratch. It means you will drag different elements and drop them to the page workspace. The second is much easier, so I’ll show you this way…
In the center of the work area you can see two buttons, click the grey “Add Template” button.
Now you have two options. The first is to create the page from scratch. It means you will drag different elements and drop them to the page workspace. The second is much easier, so I’ll show you this way…
In the center of the work area you can see two buttons, click the grey “Add Template” button.
 The library which now opens contains lots of page templates and many of them are free to use. Elementor templates are not the same thing as themes. A theme is a set of ready-made pages, all customized in a solid design while a template is a collection of LEGO pieces (elements). Templates are basically one page comprised of many elements.
 Choose the page you liked and click the “Insert” button. I’ve chosen the Restaurant Homepage – just to show you what it looks like. The page you have loaded doesn’t affect the header and footer of your website – it fills only the “body” with demo content. As you can see – the inserted page is combined with customized standard elements and you can change them any way you want.
 To start the customization, you have to click on the element that you want to change and a menu will open in the field to the left. That menu has three tabs: “Content”, “Style” and “Advanced”.
The “Content” tab allows you to change what will be displayed in that element – text, picture, link or anything else. Here you customize the pure essence, without any styling.
To start the customization, you have to click on the element that you want to change and a menu will open in the field to the left. That menu has three tabs: “Content”, “Style” and “Advanced”.
The “Content” tab allows you to change what will be displayed in that element – text, picture, link or anything else. Here you customize the pure essence, without any styling.
 The “Style” tab gives you the tools to change your contents appearance. Colors, fonts, backgrounds, alignments, borders, and margins. The interface is simple, so I’m sure you will understand how to use it after playing around just for a few minutes.
 The “Advanced” tab contains different additional functions like the whole element’s background or entrance animation. You won’t need it much of the time, but you still should still get to know the functions here for when you do need them.
 With Elementor Page Builder creating pages becomes easy and interesting like playing a video game. You choose the template with fitting structure, apply it, and then customize according to the design of the theme you use (or not, it’s totally up to you what your site should look like, but I recommend to at least stick to a set color scheme). Also, after creating a page you can save it as a template and use for all other parts of the website.
How to Create a Post with Elementor
When it comes to new post creation, you can’t just follow the same process I described above, so let’s try to create a post from the ground up and look at a few other features. What does a post consist of? Usually, it is comprised of the title, featured image, metadata, text, sharing buttons and comments. There could be some differences in your case, so if you think you need to add some other buttons or lists – do it. Here I’ll create a very simple post so that you can see how all the basic functionalities work. I will start dropping all the mentioned elements to the work field (some of them are already there). Don’t worry, if at some point you would like to change the position of any element – it won’t be a problem.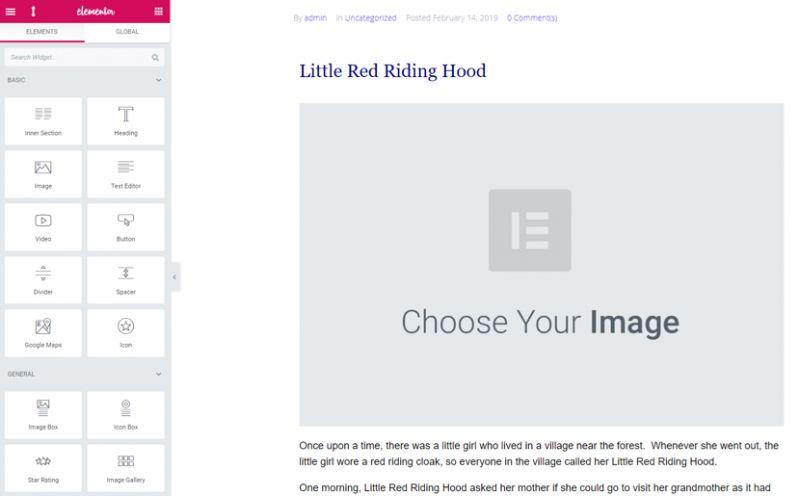 It is time to make it all look prettier. Press the title element and set the details of the appearance you want it to have. In my case, I would like to change the font, alignment, and size of the title.
 Now let’s set the picture. Click on the image element, choose the picture and set the margins.
I also added the text of the post to the text section and changed the font and size of the letters. Sharing buttons and comment section are OK, so I left them as is.
Now let’s set the picture. Click on the image element, choose the picture and set the margins.
I also added the text of the post to the text section and changed the font and size of the letters. Sharing buttons and comment section are OK, so I left them as is.
 Voila! A simple post page is ready. To save it as a template for further use you have to press the little arrow button in the bottom and choose a saving option.
Conclusion
There are a ton of other functions Elementor could offer you, but mastering the Elementor Page Builder basics alone will open a huge and convenient toolbox for you. Elementor Page Builder is a great tool and with its help, you will be able to create an even more marvelous blog than you have already.