Table of Contents
Hold Tight, Your Free Blogging Course Is On The Way...
Thanks! Your FREE BLOGGING COURSE will be sent to your email address in the next 10-15 minutes.
While You Wait…
Before you can do anything, you need to get your website hosting set up. This will take you about 10 minutes, so let’s get that taken care of right now! Here’s an easy-to-follow step-by-step guide on setting up your web hosting with the best web hosting provider on the planet…1. Go to HostGator.com and click the big yellow button!
Remember: Since I’m using HostGator myself too, I’ve negotiated a discount for readers who use this guide (62% off). This discount will apply automatically when you click on the link. Enjoy!
2. Pick a Domain Name for Your New Blog
(Already have a domain name? Just click on “I already own this domain” and enter your domain. Then move on to Step 3 by scrolling down a bit.)
How do I choose a good domain name?
Tip: Don’t worry about picking the perfect domain name. Your domain name isn’t cast in stone, you can always change it later if you wish through a 301 redirect.
Be sure you choose a domain name that is…
1. Easy to Remember – Don’t choose a nonsensical name, something tough to spell, or a long name full of dashes. “www.best-tech-gadgets-in-the-world.com” won’t ever stick in someone’s head, but something like “www.techgeeks.com” rolls off the tongue.
2. Unique and Descriptive – You want a name that reflects who you are and what you care about. Be creative and build an identity you’re excited about!
3. Trustworthy – Domain extensions like “.com”, “.org” or “.net” are the most popular, with “.com” being the one most people think of first. Try to avoid crazy extensions like “.rocks” or “.biz”, as these are less commonly used, tougher to remember and not as trusted.
Still stuck? Just use your name as the domain name, eg JohnDoe.com. The pro is that you’re free to decide/change your blog topic later. In the meantime, you get to build your personal branding.
If you already know your blog topic, then try adding these prefixes/suffixes to your topic:
- house
- central
- point
- home
- place
- garden
- site
- spot
- park
- dome
- bay
- web
- net
- cave
- base
- heaven
- portal
- world
- camp
- network
- county
- street
- city
- alley
- depot
- valley
- now
- resources
- tools
- source
- review
- system
- book
- guide
- talk
- data
- vision
- load
- box
- focus
- beat
- voice
- share
- cafe
- nexus
- zone
- sight
- link
- lab
- insight
- vine
- board
- flow
- signs
- network
- wire
- cast
- ville
- nation
- egg
- cove
- news
- today
- future
- fun
- watch
- story
- fever
- coast
- side
- road
- heat
- bite
- insider
- club
- connect
- the
- my
- i
- me
- we
- you
- e
- top
- pro
- best
- super
- ultra
- all
- cyber
- simply
- free
- 1st
- meta
- re
- metro
- urban
- head
- hit
- front
- techno
- ever
- rush
- think
- solo
- radio
- vip
- hot
- smart
- cool
- hot
- fast
- fresh
- sleek
- first
- daily
- best
- sharp
- light
- classic
- fast
- great
- quick
- ubi (when)
- bis (twice)
- ad (to, towards)
- ambi (both)
- inter (between)
- liber (free)
- mono (single)
- poli (many)
- tele (distant)
- omni (all)
- exo (outside)
- extra (addition)
- hyper (over)
- hypo (under)
- intro (within)
- proto (first)
- intra (within)
- micro (little)
- macro (large)
- multi (many)
- neo (new)
- iso (equal)
- mono (one)
- io (I in Italian)
- virtus (virtue)
- ego (me)
- vox (voice)
- ex (out of)
- ideo (idea)
- novo (renew)
- novus (novelty)
- pax (peace)
- rex (king)
- velox (fast)
- verus (true)
- vivo (alive)
- nova (new)
- pico
- nano
- micro
- milli
- kilo
- mega
- giga
- tera
- peta
- aero
- cosmo
- deca
- eco
- geo
- hex
- oxy
- uni
- poly
- media
- direct
- access
- ez
- easy
- info
- interactive
- biz
- buzz
- bit
- byte
- up
- tech
- on
- out
- auto
- pulse
- x
- venture
- trend
- life
- retro
- secret
Type the domain name you want to use in the box, then click “next”. If the name is available, you’ll be able to claim it. If it’s not available, choose another one.
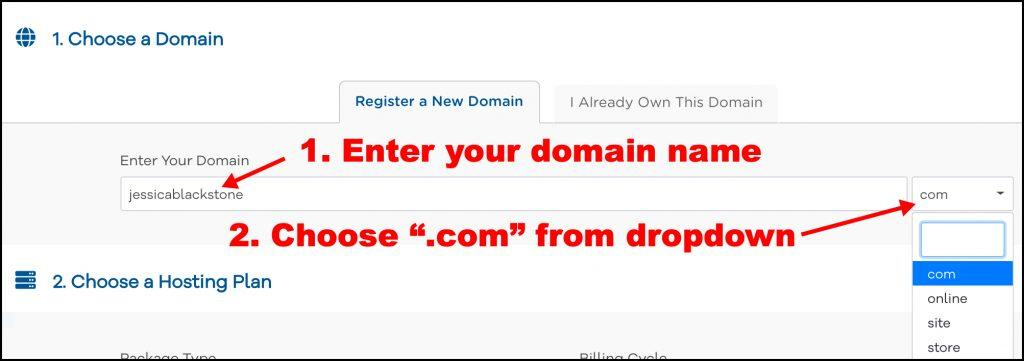
If the name you want isn’t available, HostGator will show you some alternatives that are similar – or you can punch in a new name and try again. I’d suggest you use something that ends with .com, .net or .org
3. Choose Your Blog Hosting Plan
I recommend the “Hatchling” plan for now – you can always upgrade later if you decide you want more advanced features, but you get more than enough with Hatchling.
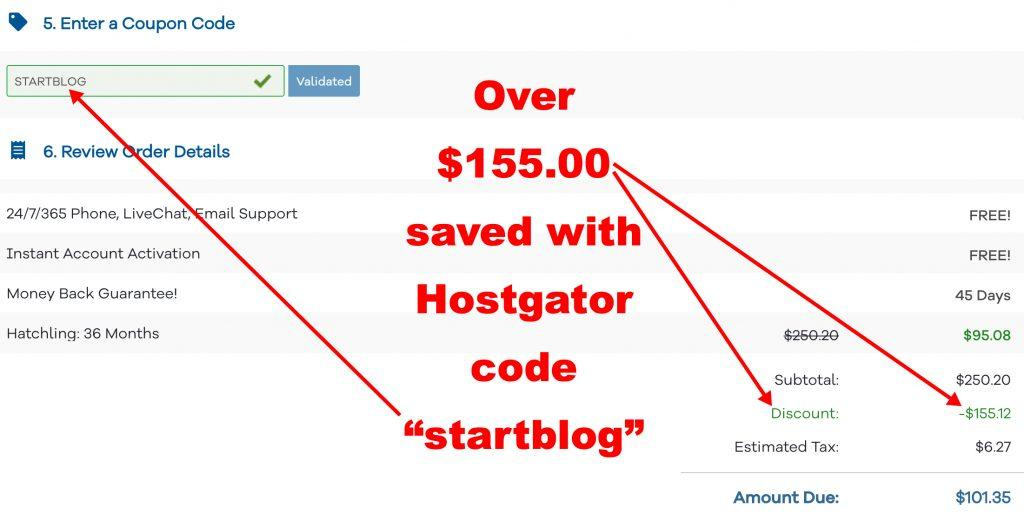
Having cold feet? HostGator offers a 45-day money back guarantee so you have nothing to worry about.
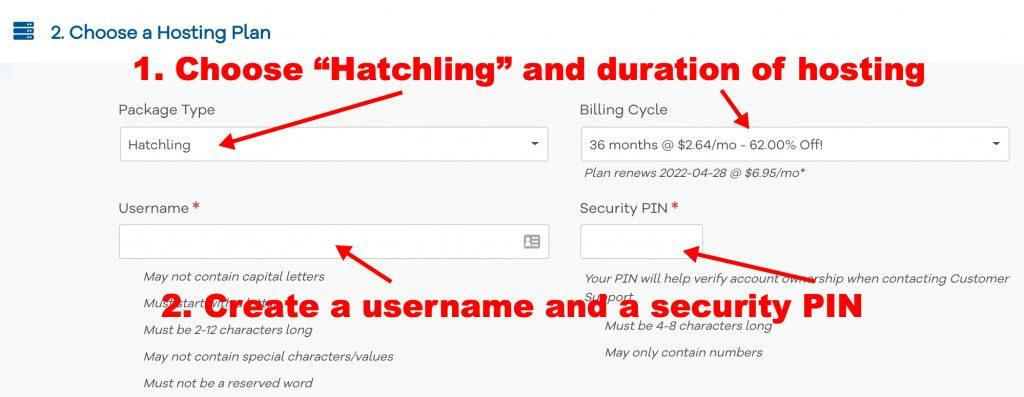
4. Complete Your Registration
Once you’ve chosen Hatchling plan and found a name you like that’s available, you’ll need to register it by putting in your contact and billing information.
At this stage, you can also remove any extras that are already checked and get it even cheaper!
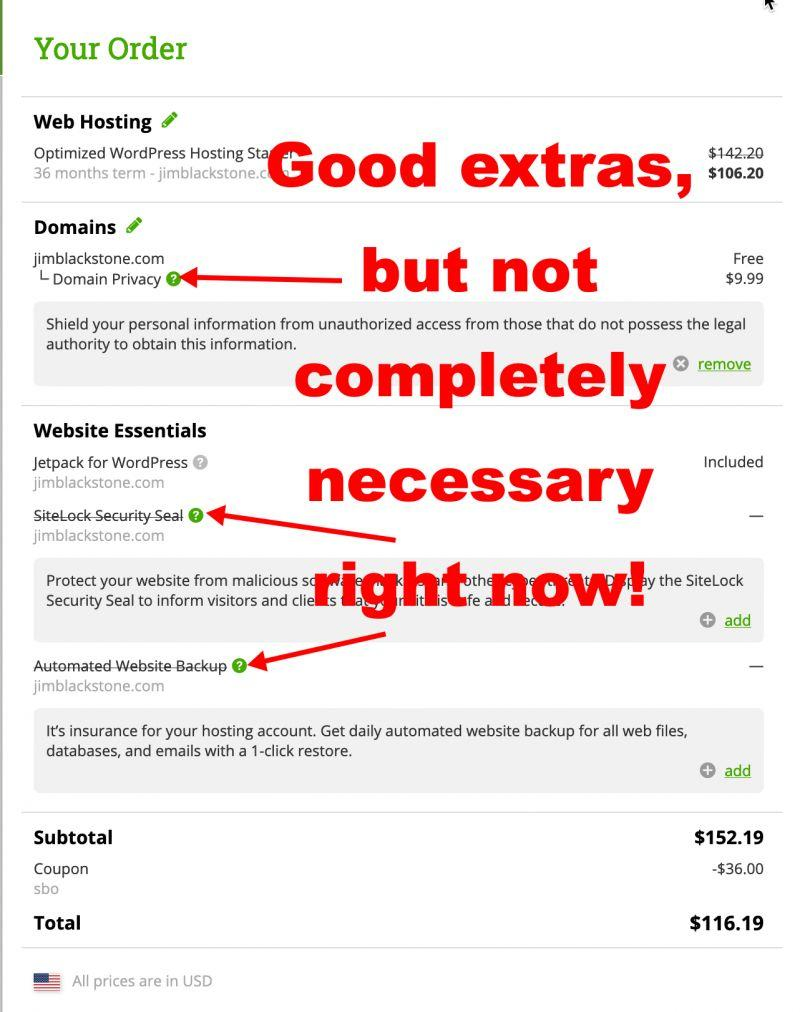
After you customize your package a bit, this is where you can ensure you save some more money, so don’t skip it!
Apply discount code “startblog” to get 62% off.
5. Log in to Your New Account and Install WordPress
Once you’ve logged in to your control panel (all the information you need for that should be on your inbox), it’s time to install WordPress. Thankfully, this takes just one click!
- Log-in to your HostGator control panel
- At the top click “Get Started With WordPress Today”
- If WordPress isn’t there for some reason, scroll down a little bit on the control panel and click on “Quick Install” under the Software & Services section. Look at the top of the page, in the left sidebar section for WordPress.
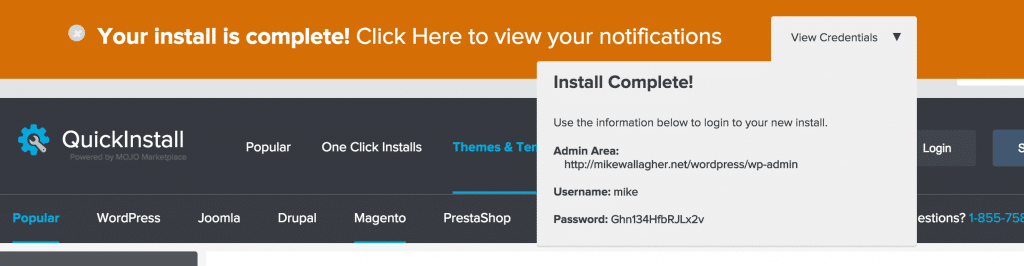
Once clicked, you’ll be automatically transferred to Mojomarketplace.com – don’t panic, this is just a site that helps HostGator install platforms (like WordPress).
You should immediately see a screen where you’re offered to “Install” or “Import” WordPress. Click “Install” to get to the next step.
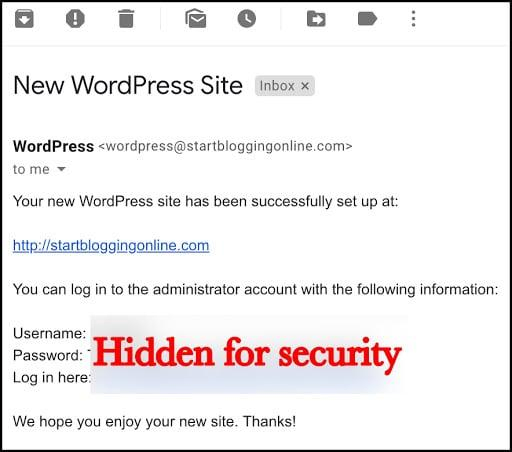
When you’re finished, “Install WordPress”. Once you’ve done that, you’ll see a loading bar at the top of your page that will eventually tell you that your WordPress blog has been installed and you’ll see your log-in credentials.
6. Log in and Check Out Your Brand New Blog!
Congratulations – you now know how to make a blog using WordPress. You’ve installed WordPress and set up your blog, all on your own! As you can see, it’s really easy and straightforward.
Happy blogging!

Our #1 Choice For Hosting Blogs
62% Off Exclusive Offer Applied at Checkout
Regularly
$6.95/mo
Starting From
$2.64/mo*
- Free 1 Year Domain Registration on Select Plans
- FREE SSL Certificate
- Drag-and-drop Website Builder
- E-commerce Ready
- 1-Click WordPress Installation